Kubernetes Tutorials Feature Image Setup Cluster Part1

# Ultimate Kubernetes Tutorial Part 1: Setting Up a Thriving Multi-Node Cluster on Mac

Table of Contents

Introduction

Hey there! Welcome to this Kubernetes tutorial! Ever dreamed of running a real multi-node Kubernetes (K8s) cluster on your laptop instead of settling for Minikube’s diet version? A proper real multi-node Kubernetes environment requires virtual machines, and until last year, VMware Fusion was a paid product—an obstacle for many. I know there are alternatives, like KVM, Oracle VirtualBox, and even Minikube’s so-called multi-node mode ----but let’s be real: I’ve got a beast of a MacBook Pro, so why not flex its muscles and spin up a legit multi-node cluster? 🚀

But great news! On November 11, 2024, VMware announced that Fusion and Workstation are now free for all users! The moment I stumbled upon this announcement, I was thrilled. Time to roll up my sleeves, fire up some VMs, and make this cluster a reality. Kick off my Kubernetes tutorial! Let’s dive in! 🚀


Project Overview

My Goal

In this series of Kubernetes tutorial, I want to set up a full Kubernetes cluster on my MacBook Pro using VMware Fusion, creating multiple VMs to simulate real-world deployment and practice my DevOps and IaC (Infrastructure as Code) skills.

Planned Setup

  1. Create a VM as Base VM (Rocky Linux 9)

    • Configure networking
    • Update system packages
    • Disable firewalld
    • Enable SSH passwordless login from local Mac to the base VM
    • Set up zsh, tmux, vim and common aliases
    • Install Miniforge for Python environment management
    • Install and configure Ansible
  2. Set up a Local Server Node (localserver)

    • Clone from the above base VM image
    • Create an Ansible script to customize the base VM image withe new hostname, SSH keys, and networking
    • Set up DNS and NTP servers as our internal hostname resolution and local time sync up
  3. Create Kubernetes Nodes (k8s-1 to k8s-4)

    • Clone from the base image
    • Using the same Ansible script to customize new VMs’ hostname, SSH keys, and networking
    • Install core Kubernetes packages (containerd, kubelet, kubeadm, kubectl)
    • Enable firewalld and open necessary ports (Yes! Many online articles disable firewalld setup in their tutorils, but I want lift the bar! Get it work with iptables like a production environment!)
  4. Cluster Formation

    • Setup k8s-1 as Master Node with Flannel as CNI plugin
    • Setup k8s-2, k8s-3, k8s-4 as Worker Nodes and join the cluster
  5. Test/Deploy Nginx Service into Cluster via NodePort

  6. Setup Kubernetes Cluster Dashboard

  7. More is coming!


Networking

In the envrionment used in this Kubernetes tutorial, each VM will have two network interfaces:

  • ens160 → Connected to vmnet2 (private network created on VMFusion for Kubernetes I will talk later: 172.16.211.0/24)
  • ens224 → Shared with Mac for Internet access.
HostnameRoleIP Address (ens160)
localserverDNS Server, NTPServer172.16.211.100/24
k8s-1Master172.16.211.11/24
k8s-2Worker172.16.211.12/24
k8s-3Worker172.16.211.13/24
k8s-4Worker172.16.211.14/24

Creating the Rocky 9 Base VM

Configure a Custom Network in VMFusion

I hope you’ve already installed VMware Fusion—that part is straightforward.

To create an isolated network among VMs for Kubernetes:

  1. Open VMware FusionPreferencesNetwork
  2. Add a new network (vmnet2)
    Kubernetes tutorial part 1: network for nodes, created in VMFusion
    Kubernetes tutorial part 1: network for nodes, created in VMFusion
  3. Uncheck “Provide addresses on this network via DHCP” (as we’ll use static IPs)

Configure the Internet Network in VMFusion

This is straighgtforward, add it for each node as below:

Kubernetes tutorial part 1: internet access network


Create the Base VM and Install Rocky Linux 9

I used to work with CentOS and love it, since CentOS 9 was discontinued at the end of 2021, Rocky Linux was announced as a replacement for it. So I will setup Kubernetes on Rocky Linux 9.

You can download the ISO from here.

Please bear with me. It’s a long article, but it’s fun! Hope you will like my Kubernetes tutorial soon!

For me, in this kubernetes tutorial, my macboork is Intel, so I used Intel arch ISO and downloaded the DVD ISO, NOT the minimal ISO or boot ISO:

Kubernetes tutorial part 1: rocky linux 9 iso download page screenshot

Create a new VM from VMFusion and select the ISO to start installation.

During the Rocky 9 installation, manually set:

  • hostname: baseimage
  • password of root
  • Create a user account admin and make it as the user administrator
  • IP Address: 172.16.211.3/24
  • DNS Server:172.16.211.1008.8.8.8
  • Search Domain: dev.geekcoding101local.com (We will configure this domain later in localserver VM)
  • Pointing to NTP server running on localserver(172.16.211.100) which we will setup later.

A few screenshots:

Kubernetes tutorial part 1: create admin user during ISO installation

(I added the ens224 network adapter post the ISO installation, that’s why it’s not shown in below)

Kubernetes tutorial part 1: Configure network during ISO installation

Kubernetes tutorial part 1: pointing to NTP server during iso installation

If you forgot to configure DNS during installation, update it via command line post installation:

nmcli con mod ens160 ipv4.dns "172.16.211.100 8.8.8.8 8.8.8.4"
nmcli con mod ens160 ipv4.dns-search "dev.geekcoding101local.com"
nmcli con mod ens160 ipv4.ignore-auto-dns yes
nmcli con up ens160
nmcli dev show ens160

Once the DNS server (172.16.211.100) on localserver is up, you should be able to resolve hostnames:

nslookup baseimage
nslookup baseimage.dev.geekcoding101local.com
hostname -f
hostname -s

[infobox title=“Tips”]

Tips: Network Interface Names

The network adapter name ens160 in Rocky 9 is assigned based on Predictable Network Interface Names (PNIN), a naming convention introduced in systemd v197 to ensure stable and predictable interface names across reboots and hardware changes. The name ens160 specifically follows the “Firmware/BIOS Index-based Naming” scheme, where:

  • e stands for Ethernet.
  • n indicates it’s a network device.
  • s160 refers to the firmware (BIOS/UEFI) assigned index, which is based on how the hypervisor or hardware presents the device.

Why is it ens160?

On VMware, the ens160 interface name is commonly assigned because VMware presents the first virtual NIC with firmware index 160. This is specific to VMware’s implementation.

Is it Consistent Across All Rocky Linux 9 Installs?

Not necessarily. The naming depends on the hardware and hypervisor:

  1. VMware: The first NIC is typically named ens160 because of VMware’s firmware enumeration.
  2. Physical Machines: The first NIC may be named ens3, ens5f0, enp1s0, eno1, etc., depending on:
    • PCI bus topology (enpXYSZ for PCI enumeration).
    • Onboard NICs (enoX for motherboard NICs).
    • BIOS/firmware-assigned index (ensX for BIOS indexing).
  3. Other Hypervisors:
    • KVM/QEMU: Uses ens3 or enp1s0 (based on PCI bus mapping).
    • Hyper-V: Uses eth0 or ensX.

Can You Change It?

Yes, if you want to ensure consistent naming across environments, you can override it using:

  • udev rules (/etc/udev/rules.d/70-persistent-net.rules)

  • GRUB kernel parameters (disable PNIN):

    grubby --update-kernel=ALL --args="net.ifnames=0 biosdevname=0"

    This will revert to eth0, eth1, etc.

This is out of the scope of our current blog post, feel free to add a comment if you want to see a post about how to override it.

[/infobox]

Do you like above style of Tips? Hope so! I will test out this format in this Kubernetes tutorial, let me know!

Once system is up, let’s disable firewalld, obvisouly I don’t stuck due to any firewall issue as a base VM image (We will turn it on when setting up Kubernetes cluster):

systemctl stop firewalld
systemctl disable firewalld
systemctl mask firewalld
  • disable: Disables the service from starting automatically at boot but doesn’t prevent manual starts.
  • mask: Prevents the service from being started manually or automatically by creating a link to /dev/null.

Thanks for your reading! I hope you enjoy my kubernetes tutorial so far!


Update Packages

Here I installed my favorite packages/tools, including vim, tmux, zsh and etc.

You can add your own essentials tools in below list so that you can get it on every new VM cloned from this base VM image:

dnf update -y
dnf install vim wget git tmux perl-Time-HiRes bind-utils util-linux-user zsh -y
  • perl-Time-HiRes: required by tmux to show time.
  • bind-utils: provides nslookup and other DNS related tools
  • util-linux-user: provides chsh

Setup password-less SSH authentication from local to VM

I love this! It’s a must for any development environment settings!

It’s so annoying if you need to type password at every login!

[infobox title=“Tips”]

Rocky Linux 9 DVD has installed SSHD server by default.

[/infobox]

Typically, we should use ssh-agent for better key management and security, but since this is a base image and we just want password-less access from our local Mac to the new VMs, it’s simpler to prepare the authorized_keys file. This way, we can quickly enable password-less authentication without dealing with additional setup or dependencies! That’s what I will use in this kubernetes tutorial!

  1. Perform the steps on local machine (mine is the macbook pro) :

    ssh-keygen -t rsa

    Just follow the steps, using default settings, you will get your key pairs at ~/.ssh/id_rsa.pub and~/.ssh/id_rsa. Save the output of content of ~/.ssh/id_rsa.pub by cating it:

    cat ~/.ssh/id_rsa.pub
  2. Log into baseimage as root to perform:

    mkdir -p /root/.ssh/
    touch /root/.ssh/authorized_keys
    chmod 600 /root/.ssh/authorized_keys
    vi /root/.ssh/authorized_keys

    In above vi editor, paste your content of~/.ssh/id_rsa.pub and save it. Repeat above steps for creating .ssh folder and populate the /home/admin/.ssh/authorized_keys for admin account. Then restart sshd on base VM:

    systemctl restart sshd
  3. Test login to the base VM from your local machine, you will not need to type password:

    ssh -vv root@172.16.211.3
    ssh -vv admin@172.16.211.3

    Using -vv at this moment is useful, because most likely your first time setup ssh passwordless authentication would fail due to this or that misconfiguration. With -vv you can spot the error message. Good luck!


Set Up Essential Tools

Create a shared tools directory:

mkdir -p /opt/share_tools/bin/
chmod 755 -R /opt/share_tools/

Verify directory permissions:

ls -l /opt | grep share
ls -l /opt/share_tools

Setup Zsh as the Shared Default Shell

Zsh is the first basic thing I want to cover in this Kubernetes tutorial!

Zsh is the default shell on Mac. I want to have it on the Rocky Linux VM as well.

  1. Install Zsh and Packages (Ensure Zsh is Installed)
    Zsh should already be installed in the “Update OS and Install Packages” section. This guide is best viewed on GeekCoding101—where it was originally published

  2. Install Oh-My-Zsh
    Run the following command to install Oh-My-Zsh:

    wget https://github.com/robbyrussell/oh-my-zsh/raw/master/tools/install.sh -O - | zsh

    By default, Oh-My-Zsh is installed in your user’s home directory (~/.oh-my-zsh).

  3. Copy the Checked Out Folder to a Shared Path
    Copy the Oh-My-Zsh directory to a shared path:

    cp -r ~/.oh-my-zsh /usr/share/oh-my-zsh
  4. Install Powerlevel10k to a Shared Path
    Clone the Powerlevel10k theme into a shared location:

    git clone --depth=1 https://github.com/romkatv/powerlevel10k.git /usr/share/powerlevel10k

    You needs to have Patched font to display the icons on shell console. Recommended font can be downloaded at here: Meslo Nerd Font patched for Powerlevel10k.

    I am using iTerm2 , so configure the font for the profile as below:

    Kubernetes tutorial part 1: iterm2 font settings
    Kubernetes tutorial part 1: iterm2 font settings

  5. Update ~/.zshrc
    Modify your .zshrc to use the shared paths (Here I used ~/.zshrc, but we don’t need this for every user, because later we will dump the content of ~/.zshrc to /etc/zshrc for all users):

    export ZSH="/usr/share/oh-my-zsh"
    ZSH_THEME="powerlevel10k/powerlevel10k"
  6. Copy Configured Files to /etc/skel for New Users
    Once the configuration is complete, copy the necessary files to the /etc/skel directory for new users:

    cp ~/.zshrc /etc/skel/
    cp ~/.p10k.zsh /etc/skel/
    chmod 644 /etc/skel/.zshrc /etc/skel/.p10k.zsh
  7. Set Default Shell for New Users
    Update /etc/default/useradd to set Zsh as the default shell for new users:

    SHELL=/bin/zsh

Modify /etc/zshrc for Shared Configuration

At the end of /etc/zshrc, add the following to handle SSH sessions:

# Check if this is an SSH session
# If not, launch bash because console fonts couldn't support oh-my-zsh
if [[ ! -n "$SSH_CONNECTION" ]]; then
exec /bin/bash
fi

Kubernetes tutorial part 1: launch bash if not ssh

You might notice above screenshot has a very nice status bar in Vim, let me know in comments if you want to know how I customized my Vim ^^ (This guide is best viewed on GeekCoding101—where it was originally published. 🚀) Append the .zshrc configuration into /etc/zshrc:

cat .zshrc >> /etc/zshrc

Set Up Global Aliases in /etc/zshenv

Populate /etc/zshenv with the my favorite aliases:

alias ls='ls -G'
alias ll='ls -G -l'
alias la='ls -G -la'
# Git
alias gs='git status '
alias ga='git add '
alias gb='git branch '
alias gba='git branch -a'
alias gbd='git branch -d'
alias gbr='git branch -r'
alias gc='git commit '
alias gd='git diff '
alias gdh='git diff HEAD '
alias gco='git checkout '
alias glg='git log --graph --name-only '
# Get pods
alias k=kubectl
alias kg='kubectl get'
alias kga='kubectl get all --all-namespaces'
alias kgns="kubectl get ns --show-labels"
alias kgp="kubectl get pods -o wide"
alias kgpn="kubectl get pods -o wide -n "
alias kgpa="kubectl get pods -A -o wide"
alias kgpjson='kubectl get pods -o=json' # options: -n <ns> <pn>
alias kgpsys='kubectl --namespace=kube-system get pods'
alias kgs="kubectl get service -o wide"
alias kgsn="kubectl get service -o wide -n"
alias kgn="kubectl get nodes -o wide"
# Describe
alias k=kubectl
alias kdns='kubectl describe namespace'
alias kdn='kubectl describe node'
alias kdpn="kubectl describe pod -n" # options: -n <ns> <pn>
# Delete
alias krm='kubectl delete'
alias krmf='kubectl delete -f'
alias krming='kubectl delete ingress'
alias krmingl='kubectl delete ingress -l'
alias krmingall='kubectl delete ingress --all-namespaces'
# Misc
alias ka='kubectl apply -f'
alias klo='kubectl logs -f'
alias kex='kubectl exec -i -t'
export GPG_TTY=$(tty)
export SHARE_TOOLS="/opt/share_tools/bin/"
export PATH=${SHARE_TOOLS}:$PATH

Update zsh For Existing Users

I know this is our first VM, but just in case you want to configure on your existing VM, for users created before setting up Oh-My-Zsh and Powerlevel10k, update their shell to Zsh (replace the ${targetuser} with your real username):

chsh -s /bin/zsh ${targetuser}

Maintenance

For future maintenance purpose, we only need to update the following files:

  • /etc/zshenv
  • /etc/zshrc

Oh-My-Zsh will check update and prompt when everytime you login. So no need worry there!

Thanks for your reading! So far so good? I hope you enjoy my kubernetes tutorial! If any feedback, feel free to leave your comments!


Configure Tmux for Multi-Session Management

Ever had SSH sessions drop in the middle of a deployment? Or needed to juggle multiple terminals like a hacker in a sci-fi movie? tmux solves it all. With persistent sessions, split panes, and the ability to detach and reattach at will, I can effortlessly manage multiple Kubernetes nodes, tail logs, and run long processes without worrying about losing my progress. It’s basically my command-line command center, a friend of Kubernetes cluster administrator, and once you get hooked, there’s no going back. 🚀 This is another must for any development environment! Let me show you the tricks in this kubernetes tutorial!

Tmux Launcher Script

I want to luanch Tmux automatically when SSH into the VM, it needs a script to launch it and hook it into zsh launch.

Create a script for launching tmux:

vim /opt/share_tools/bin/launch_tmux.sh
chmod +x /opt/share_tools/bin/launch_tmux.sh

Script contents:

#!/bin/zsh
SESSION_NAME="k8s"
if [ -z "$TMUX" ]; then
tmux has-session -t ${SESSION_NAME} 2>/dev/null
if [[ $? != 0 ]]; then
tmux new-session -s ${SESSION_NAME}
else
tmux ls | grep -q "${SESSION_NAME}:.*(attached)"
if [[ $? == 0 ]]; then
tmux new-session
else
tmux attach -t ${SESSION_NAME}
fi
fi
else
echo "Tmux session $SESSION_NAME already exists."
fi

Append below into /etc/zshrc:

# Launch tmux
# Check if the user is connected via SSH
if [[ -n "$SSH_CONNECTION" ]]; then
# Launch the tmux script
/opt/share_tools/bin/launch_tmux.sh
fi

Kubernetes tutorial part 1: launch tmux if it is ssh

Now open new ssh will see (default tmux + oh-my-zsh + powerlevel10k):

Kubernetes tutorial part 1: tmux initial show screenshot

Install and Configure gpakosz/.tmux.git for Tmux

The UI of above TMUX was too plain?! Not cool !

Okay, let’s customize it a little bit with gpakosz/.tmux.git!

Log into the base VM as root to perform (This guide is best viewed on GeekCoding101—where it was originally published):

git clone https://github.com/gpakosz/.tmux.git /opt/gpakosz.tmux/
ln -s /opt/gpakosz.tmux/.tmux.conf /etc/tmux.conf

Set below in /etc/zshenv:

# For make tmux for all users on the VM, must define TMUX_CONF to /etc/tmux.conf.
# It won't work if set TMUX_CONF to other values, like "/opt/gpakosz.tmux/.tmux.conf"
export TMUX_CONF="/etc/tmux.conf"
export TMUX_CONF_LOCAL="/opt/gpakosz.tmux/.tmux.conf.local"

Create the file link:

ln -s /opt/gpakosz.tmux/.tmux.conf /etc/tmux.conf

Ensure perl-Time-HiRes is installed at the Update_Packages step.

Customize the TMUX theme

Append below into /opt/gpakosz.tmux/.tmux.conf.local before the line # -- custom variables:

# increase history size
set -g history-limit 9999999
# start with mouse mode enabled
set -g mouse on
bind-key -n C-S-Left swap-window -t -1\; select-window -t -1
bind-key -n C-S-Right swap-window -t +1\; select-window -t +1
# -- custom variables ----------------------------------------------------------

Still in /opt/gpakosz.tmux/.tmux.conf.local, find mode-keys vi and uncomment it:

enable vi in tmux

Continue customization in/opt/gpakosz.tmux/.tmux.conf.local.

I’d like to change some color, just follow me find below settings and update as below:

tmux_conf_theme_left_separator_main='\uE0B0' # /!\ you don't need to install Powerline
tmux_conf_theme_left_separator_sub='\uE0B1' # you only need fonts patched with
tmux_conf_theme_right_separator_main='\uE0B2' # Powerline symbols or the standalone
tmux_conf_theme_right_separator_sub='\uE0B3' # PowerlineSymbols.otf font, see README.md
tmux_conf_theme_status_left=" ☮️ #S | "
# status right style
tmux_conf_theme_status_right_fg="$tmux_conf_theme_colour_12,$tmux_conf_theme_colour_14,$tmux_conf_theme_colour_6"
tmux_conf_theme_status_right_bg="$tmux_conf_theme_colour_15,$tmux_conf_theme_colour_17,$tmux_conf_theme_colour_9"
tmux_conf_theme_left_separator_main='\uE0B0'
tmux_conf_theme_left_separator_sub='\uE0B1'
tmux_conf_theme_right_separator_main='\uE0B2'
tmux_conf_theme_right_separator_sub='\uE0B3'

Now take a look (I just used the localserver VM we will create later to take a screenshot, the top right “localserver” is set by iTerm2) !

Kubernetes tutorial part 1: tmux with oh my zsh
:::success

Do you feel boring so far? I hope not! If any feedback about this kubernetes tutorial, looking forward to seeing your comments!

:::


Install Miniforge

I haven’t thought about what exact use case I need Python in this Kubernetes environment, but I want to have Python management toolkit ready on the base image so that it can become handy in future. Let’s cover this in thisKubernetes tutorial as well!

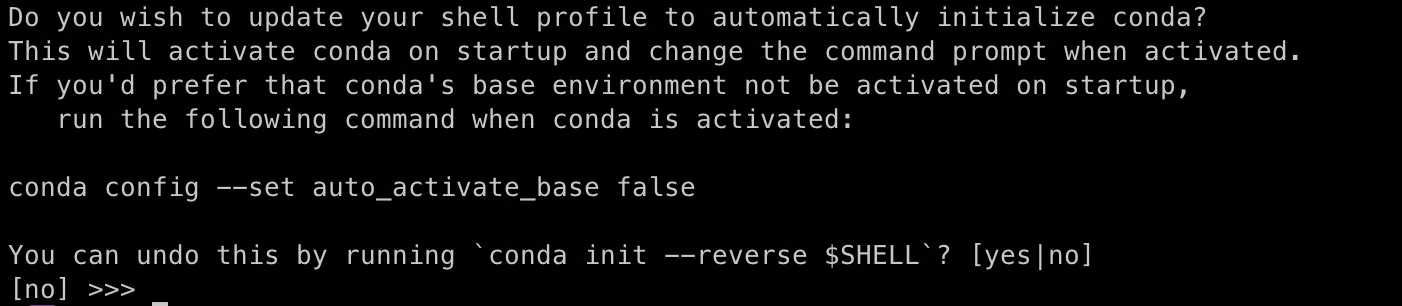
In my development environment, e.g. this Kubernetes cluster environment, I prefer Miniforge over Conda to manage Python, because — why deal with the bloated, corporate-flavored Anaconda distribution when you can have a lightweight, community-driven alternative that just works? 🚀 Miniforge gives you the same Conda package management power, but without the unnecessary packages, keeping it fast and minimal.

The installation is simple.

Run curl command to download from here.

Then install it to /opt/miniforge3 so that every user can use it:

curl -L -O "https://github.com/conda-forge/miniforge/releases/latest/download/Miniforge3-Linux-x86_64.sh"
chmod +x Miniforge3-Linux-x86_64.sh
❯ ./Miniforge3-Linux-x86_64.sh -h
usage: ./Miniforge3-Linux-x86_64.sh [options]
Installs Miniforge3 24.11.3-0
-b run install in batch mode (without manual intervention),
it is expected the license terms (if any) are agreed upon
-f no error if install prefix already exists
-h print this help message and exit
-p PREFIX install prefix, defaults to /root/miniforge3, must not contain spaces.
-s skip running pre/post-link/install scripts
-u update an existing installation
-t run package tests after installation (may install conda-build)
❯ ./Miniforge3-Linux-x86_64.sh -p /opt/miniforge3

During the installation, it also asked me to update Shell, I answered yes:

miniforge installation

After installation, I noticed that /etc/zshrc got updated as below:

# >>> conda initialize >>>
# !! Contents within this block are managed by 'conda init' !!
__conda_setup="$('/opt/miniforge3/bin/conda' 'shell.zsh' 'hook' 2> /dev/null)"
if [ $? -eq 0 ]; then
eval "$__conda_setup"
else
if [ -f "/opt/miniforge3/etc/profile.d/conda.sh" ]; then
. "/opt/miniforge3/etc/profile.d/conda.sh"
else
export PATH="/opt/miniforge3/bin:$PATH"
fi
fi
unset __conda_setup
if [ -f "/opt/miniforge3/etc/profile.d/mamba.sh" ]; then
. "/opt/miniforge3/etc/profile.d/mamba.sh"
fi
# <<< conda initialize <<<

You can see it set PATH in above, but just to be safe, in order to find programs under /opt/miniforge3/bin, I also manually updated my /etc/zshenv as below:

export MINIFORGE="/opt/miniforge3/bin"
export PATH=${MINIFORGE}:${SHARE_TOOLS}:$PATH

Let’s run a test:

❯ conda env list
# conda environments:
#
base * /opt/miniforge3


Do you like my kubernetes tutorial so far? Rate it a 5 star!


Install and Configure Ansible

Okay, now it’s time to install Ansible in this Kubernetes tutorial. Let’s use Ansible to manage the operations in Kubernetes nodes.

dnf install epel-release -y
dnf install ansible -y

Generate a default configuration file:

ansible-config init --disabled > /etc/ansible/ansible.cfg

Update /etc/zshenv to append below line:

export ANSIBLE_CONFIG=/etc/ansible/ansible.cfg

Source /etc/zshenv:

source /etc/zshenv

Update /etc/ansible/ansible.cfg:

[defaults]
inventory = /etc/ansible/hosts
log_path = /var/log/ansible.log
host_key_checking = False
retry_files_enabled = False
timeout = 10
display_skipped_hosts = False

Verify installation:

[warningbox title=“Tips:”]

If not add export line in /etc/zshenv and source it,  then ansible —version will use /root/ansible.cfg, like this:

[/warningbox]

Configure Ansible Hosts

Edit /etc/ansible/hosts:

[base]
baseimage ansible_host=172.16.211.3 ansible_user=root ansible_ssh_private_key_file=~/.ssh/ansible_ed25519
[application_servers]
localserver ansible_host=172.16.211.100 ansible_user=root ansible_ssh_private_key_file=~/.ssh/ansible_ed25519
[k8s_cluster]
k8s-1 ansible_host=172.16.211.11 ansible_user=root ansible_ssh_private_key_file=~/.ssh/ansible_ed25519
k8s-2 ansible_host=172.16.211.12 ansible_user=root ansible_ssh_private_key_file=~/.ssh/ansible_ed25519
k8s-3 ansible_host=172.16.211.13 ansible_user=root ansible_ssh_private_key_file=~/.ssh/ansible_ed25519
k8s-4 ansible_host=172.16.211.14 ansible_user=root ansible_ssh_private_key_file=~/.ssh/ansible_ed25519

SSH Key Setup for Ansible

Let’s generate a new key pair for Ansible purpose, also for easy maintenance and isolation:

ssh-keygen -t ed25519 -C "ansible-key" -f ~/.ssh/ansible_ed25519
ssh-copy-id -i ~/.ssh/ansible_ed25519.pub root@172.16.211.3

Test SSH access

ssh -i ~/.ssh/ansible_ed25519 root@172.16.211.3

Run a quick Ansible test:

ansible baseimage -m ping

Example output:

[warningbox title=“Tips”]

Tips: Why do we need ansible_ssh_private_key_file in/etc/ansible/hosts ?

If without it, you might see below output in ping test:

[/warningbox]


[infobox title=“Preview of next post”]

I have written another Ansible script to sync specific account’s ssh key to target machine!

You will see it soon in coming kubernetes tutorial!

[/infobox]


Create configure_vm.yml Script

Think about it—cloning the base image is easy, but manually setting the hostname, network, and other configs for every VM? No thanks! That’s way too much repetitive work. 😵‍💫 I can’t tolerate such cumbersome in my kubernetes tutorial!

So, being the efficiency-loving geek that I am, I wrote a script at:
📌 /opt/share_tools/bin/configure_vm.yml

With this, after cloning this base image for our Kubertenets cluster setup, I can just feed in an input file, run the script, and boom—it automatically configures each VM with the right settings. Less typing, fewer mistakes, and more time for the fun stuff. Let’s put this script to work! 🚀

---
- hosts: localhost
gather_facts: no
vars:
input_file: "{{ input_file_path | default('input.json') }}"
config: "{{ lookup('file', input_file) | from_json }}"
ansible_key_path: "{{ config.ansible_key_path | default('~/.ssh/ansible_ed25519') }}"
ssh_key_path: "{{ config.ssh_key_path | default('~/.ssh/ssh_ed25519') }}"
tasks:
# Handle Ansible SSH Key
- name: Check if Ansible SSH private key exists
stat:
path: "{{ ansible_key_path }}"
register: ansible_key_exists
- name: Remove existing Ansible SSH private key if present
file:
path: "{{ ansible_key_path }}"
state: absent
when: ansible_key_exists.stat.exists
- name: Remove existing Ansible SSH public key if present
file:
path: "{{ ansible_key_path }}.pub"
state: absent
when: ansible_key_exists.stat.exists
- name: Generate Ansible SSH key pair
ansible.builtin.openssh_keypair:
path: "{{ ansible_key_path }}"
type: ed25519
state: present
comment: "ansible@{{ config.hostname }}"
# Handle SSH Connection Key
- name: Check if SSH private key exists
stat:
path: "{{ ssh_key_path }}"
register: ssh_key_exists
- name: Remove existing SSH private key if present
file:
path: "{{ ssh_key_path }}"
state: absent
when: ssh_key_exists.stat.exists
- name: Remove existing SSH public key if present
file:
path: "{{ ssh_key_path }}.pub"
state: absent
when: ssh_key_exists.stat.exists
- name: Generate SSH key pair for SSH connection
ansible.builtin.openssh_keypair:
path: "{{ ssh_key_path }}"
type: ed25519
state: present
comment: "ssh@{{ config.hostname }}"
- name: Debug the resolved SSH key paths for verification
debug:
msg: |
The Ansible SSH key path is {{ ansible_key_path }}
The SSH connection key path is {{ ssh_key_path }}
# Network and Hostname Configuration
- name: Set IP address and gateway using nmcli
command: "nmcli con mod ens160 ipv4.addresses {{ config.ip }}/{{ config.subnet }} ipv4.gateway {{ config.gateway }} ipv4.dns '{{ config.dns1 }} {{ config.dns2 }}' ipv4.method manual"
ignore_errors: yes
- name: Bring up the connection
command: nmcli con up ens160
ignore_errors: yes
- name: Set the hostname
command: hostnamectl set-hostname "{{ config.hostname }}"
- name: Update /etc/hosts - remove baseimage
lineinfile:
path: /etc/hosts
regexp: 'baseimage'
state: absent
- name: Update /etc/hosts - add new hostname
lineinfile:
path: /etc/hosts
line: "{{ config.ip }} {{ config.hostname }}.{{ config.domain }} {{ config.hostname }}"
state: present
- name: Update /etc/zshenv to set ANSIBLE_CONFIG environment variable
lineinfile:
path: /etc/zshenv
line: "export ANSIBLE_CONFIG=/etc/ansible/ansible.cfg"
create: yes

This one must be the longest script in current Kubernetes tutorial post!

It’s actually simple. By the way, I will always show the complete code in my kubernetes tutorial, no worry missing any code. If you spot any, comment it immediately to let me know!

It configures the VM by setting up SSH keys, network settings, hostname, and environment variables. It reads configuration details from a JSON input file (input.json by default) and applies the following steps:

1. SSH Key Management

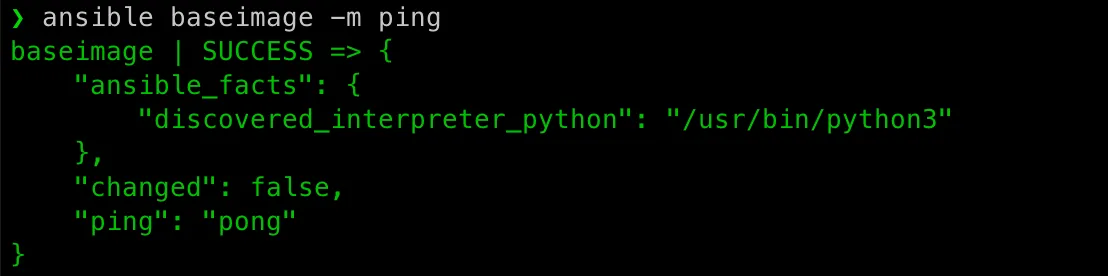
  • Ensures that both Ansible SSH keys (Remember I generated a different key pair for ansible purpose) and regular SSH keys are properly configured:
    • Removes existing keys if they are present, that’s the ones came from base image.
    • Generates new Ed25519 SSH key pairs for Ansible automation and regular SSH access.

2. Network & Hostname Configuration

  • Configures the machine’s IP address, gateway, and DNS using nmcli.
  • Brings up the modified network connection.
  • Sets the machine’s hostname using hostnamectl.
  • Updates /etc/hosts:
    • Removes any references to baseimage.
    • Adds a new entry for the machine’s IP and domain.

3. Environment Variable Setup

  • Ensures that the Ansible configuration path is set in /etc/zshenv.

[warningbox title=“Warning”]

Remember the Newwork Interface Name? You need to update ens160 in above script to your network interface name!

My bad! I should have parameterize it for the script!

[/warningbox]

This script is designed for our initial VM provisioning, ensuring SSH access, correct network configuration, and proper hostname resolution. It really makes our Kubernetes cluster setup easier!

It’s fantastic!

Base VM/Image of Kubernetes is done! Clean Up!

So now our base VM for Kubernetes is ready. You think that’s the end of this Kubernetes tutorial?! No way! It’s just a start!

Since we will clone it to new VMs, let’s clean up the logs and stale configuration.

I created below script /opt/share_tools/bin/clean_up.sh to do the clean up job!

#!/bin/bash
echo "Starting system cleanup..."
# Remove all non-builtin users except 'admin', 'nobody' and reserved users
USERS=$(awk -F: '($3 >= 1000 && $1 != "admin" && $1 != "nobody") {print $1}' /etc/passwd)
for USER in $USERS; do
echo "Deleting user: $USER"
userdel -r $USER
done
# Clean up system logs and temporary files
log_dirs=(
"/var/log"
"/var/tmp"
"/tmp"
)
# Find and delete log and temp files, and print deleted files
for dir in "${log_dirs[@]}"; do
echo "Cleaning directory: $dir"
find "$dir" -type f -name "*.log" -print -exec rm -f {} \;
find "$dir" -type f -name "*.tmp" -print -exec rm -f {} \;
done
echo "Cleaning up package manager cache..."
dnf clean all
echo "Rotating and cleaning journal logs..."
journalctl --rotate
journalctl --vacuum-time=1s
# Remove all non-hidden files under /root except anaconda-ks.cfg
echo "Keeping anaconda-ks.cfg and removing other non-hidden files under /root..."
find /root/ -maxdepth 1 -type f ! -name "anaconda-ks.cfg" -not -name ".*" -print -exec rm -f {} \;
rm -frv /root/.cache
echo "" > /root/.zsh_history
# Remove all non-hidden files under /home/admin/
echo "Removing all non-hidden files under /home/admin/..."
find /home/admin/ -maxdepth 1 -type f -not -path '*/\.*' -print -exec rm -f {} \;
# Clean up command history
> /home/admin/.bash_history
> /home/admin/.zsh_history
> /root/.bash_history
> /root/.zsh_history
echo "System cleanup complete."

Just run it once before we shutdown this base VM:

/opt/share_tools/bin/clean_up.sh

Hooray!

Spent several days crafting this Part 1 post for my kubernetes tutorial — because if I’m doing this, I’m doing it right. My mission? To deliver the best damn Kubernetes cluster setup tutorial on the internet! 🚀

Up next, in mykubernetes tutorial Part 2, I’ll walk you through setting up a localserver to handle DNS and NTP services within our Kubernetes cluster environment, laying the foundation for a fully functional Kubernetes cluster. With some luck (and zero typos in config files), we’ll have our nodes talking to each other in no time. Stay tuned! 😎

:::infoLove my kubernetes tutorial? Rate it a 5 start !:::


:::successYou’re on a roll! Don’t stop now—check out the full series and level up your Kubernetes skills. Each post builds on the last, so make sure you haven’t missed anything! 👇

🚀 In Part 1, current one.

🚀 In Part 2, I walked through configuring a local DNS server and NTP server, essential for stable name resolution and time synchronization across nodes locally. These foundational steps will make our Kubernetes setup smoother

🚀 In Part 3, I finished the Kubernetes cluster setup with Flannel, got one Kubernetes master and 4 worker nodes that’s ready for real workloads.

🚀 In Part 4, I explored NodePort and ClusterIP,understood the key differences, use cases, and when to choose each for internal and external service access!🔥

🚀 In Part 5, explored how to use externalName and LoadBalancer and how to run load testing with tool hey.:::

My avatar

Thanks for reading my blog post! Feel free to check out my other posts or contact me via the social links in the footer.


More Posts