
# Ultimate Kubernetes Tutorial Part 2: DNS server and NTP server Configuration
Table of Contents
Introduction
Hey there! Ready to take this Kubernetes setup to the next level? 🚀 In Part 1, we got our base VM image up and running—nice work! Now, in Part 2, I am going to clone that image to set up a local server as a DNS server and NTP server. I was considering to incorporate the steps to setup Kubernetes master and worker nodes, but seems too much. Anyway, a real cluster is coming soon! 😎
Excited? Let’s dive in and make some magic happen. 🔥
Create localserver VM
Clone from Base Image Rocky 9
vmrun clone /Users/geekcoding101.com/Virtual\ Machines.localized/baseimage-rocky9.vmwarevm/baseimage-rocky9.vmx /Users/geekcoding101.com/Virtual\ Machines.localized/localserver.vmwarevm/localserver.vmx fullsed -i '' 's/displayName = "Clone of baseimage-rocky9"/displayName = "localserver"/' "/Users/geekcoding101.com/Virtual Machines.localized/localserver.vmwarevm/localserver.vmx"cat "/Users/geekcoding101.com/Virtual Machines.localized/localserver.vmwarevm/localserver.vmx" | grep dispAbove commands is to clone the base VM image (display name in VMFusion is Clone of baseimage-rocky9) as a new one, then update the display name of the new VM to localserver instead of Clone of baseimage-rocky9.
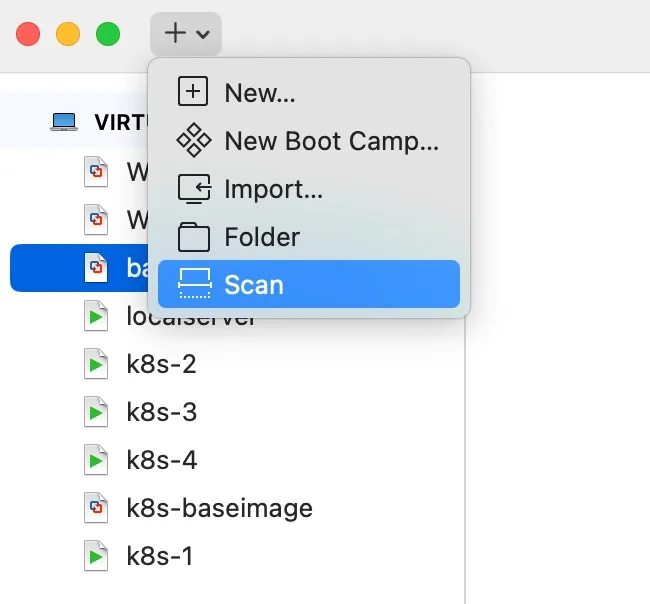
Now, you probably need to run a scan in VMware Fusion to see the newly added VM:
Customize the Local Server VM
First, stop the baseimage VM and start the localserver VM to avoid network conflict.
Now we can SSH as root into the localserver VM by using the IP172.16.211.3 of the base VM.
Remember the script /opt/share_tools/bin/configure_vm.yml we created in Ultimate Kubernetes Tutorial - Setting Up a Thriving Multi-Node Cluster on Mac: Part 1.
Let’s preapre the input file /opt/share_tools/init_data/localserver_vm_input.json:
{ "hostname": "localserver", "ip": "172.16.211.100", "subnet": "24", "gateway": "172.16.211.2", "dns1": "8.8.8.8", "dns2": "8.8.4.4", "domain": "dev.geekcoding101local.com", "ansible_key_path": "~/.ssh/ansible_ed25519", "ssh_key_path": "~/.ssh/ssh_ed25519"}I would suggest now you use the VMFusion console to run the following command instead of in the SSH terminal, because it will change the IP and might interrupt the SSH connection results script failure:
ansible-playbook /opt/share_tools/bin/configure_vm.yml -e "input_file_path=/opt/share_tools/init_data/localserver_vm_input.json"As it suggested in the input json file, the script will:
- Update hostname to
localserver - Configure the network interface defined in script to
172.16.211.100(my case isens160) - Generate SSH keys for both Ansible and normal SSH
- Apply other necessary settings
Once done, you should be able to connect via SSH with the new IP address.
Setting Up DNS Server
Now that the localserver is up, let’s install and configure the DNS server.
dnf update -ydnf install bind -yNow let’s start update the BIND configuration.
First one is /etc/named.conf:
❯ cat /etc/named.conf////// Provided by Red Hat bind package to configure the ISC BIND named(8) DNS// server as a caching only nameserver (as a localhost DNS resolver only).//// See /usr/share/doc/bind*/sample/ for example named configuration files.//
options {        listen-on port 53 { 127.0.0.1; 172.16.211.100; };        listen-on-v6 port 53 { ::1; };        directory     "/var/named";        dump-file     "/var/named/data/cache_dump.db";        statistics-file "/var/named/data/named_stats.txt";        memstatistics-file "/var/named/data/named_mem_stats.txt";        secroots-file    "/var/named/data/named.secroots";        recursing-file    "/var/named/data/named.recursing";        allow-query     { any; };        forwarders {          8.8.8.8;  # Google's DNS as a fallback        };
        /*         - If you are building an AUTHORITATIVE DNS server, do NOT enable recursion.         - If you are building a RECURSIVE (caching) DNS server, you need to enable           recursion.         - If your recursive DNS server has a public IP address, you MUST enable access           control to limit queries to your legitimate users. Failing to do so will           cause your server to become part of large scale DNS amplification           attacks. Implementing BCP38 within your network would greatly           reduce such attack surface        */        recursion yes;
        dnssec-validation yes;
        managed-keys-directory "/var/named/dynamic";        geoip-directory "/usr/share/GeoIP";
        pid-file "/run/named/named.pid";        session-keyfile "/run/named/session.key";
        /* https://fedoraproject.org/wiki/Changes/CryptoPolicy */        include "/etc/crypto-policies/back-ends/bind.config";};
logging {        channel default_debug {                file "data/named.run";                severity dynamic;        };};
zone "." IN {    type hint;    file "named.ca";};zone "dev.geekcoding101local.com" IN {    type master;    file "/var/named/dev.geekcoding101local.com.zone";    allow-update { none; };};zone "211.16.172.in-addr.arpa" IN {    type master;    file "/var/named/211.16.172.in-addr.arpa.zone";    allow-update { none; };};
include "/etc/named.rfc1912.zones";include "/etc/named.root.key";
Second file is DNS zone file /var/named/dev.geekcoding101local.com.zone:
❯ cat /var/named/dev.geekcoding101local.com.zone$TTL 86400@   IN  SOA ns1.dev.geekcoding.com. root.dev.geekcoding101local.com. (            2024010103  ; Serial            3600        ; Refresh            1800        ; Retry            1209600     ; Expire            86400 )     ; Minimum TTL
@   IN  NS  localserver.dev.geekcoding101local.com.localserver IN A 172.16.211.100  ; IP of localserver DNS
k8s-1 IN A 172.16.211.11k8s-2 IN A 172.16.211.12k8s-3 IN A 172.16.211.13k8s-4 IN A 172.16.211.14k8s-5 IN A 172.16.211.15
devbox IN A 172.16.211.99; Local server entrylocalserver IN A 172.16.211.100
Third file is /var/named/211.16.172.in-addr.arpa.zone:
❯ cat /var/named/211.16.172.in-addr.arpa.zone$TTL 86400@   IN  SOA ns1.dev.geekcoding.com. root.dev.geekcoding101local.com. (            2024010103  ; Serial            3600        ; Refresh            1800        ; Retry            1209600     ; Expire            86400 )     ; Minimum TTL
@   IN  NS  localserver.dev.geekcoding101local.com.
; PTR Records11 IN PTR k8s-1.dev.geekcoding101local.com.12 IN PTR k8s-2.dev.geekcoding101local.com.13 IN PTR k8s-3.dev.geekcoding101local.com.14 IN PTR k8s-4.dev.geekcoding101local.com.15 IN PTR k8s-5.dev.geekcoding101local.com.99 IN PTR devbox.dev.geekcoding101local.com.100 IN PTR localserver.dev.geekcoding101local.com.Let’s run a test on the files for syntax check:
named-checkzone dev.geekcoding101local.com /var/named/dev.geekcoding101local.com.zonenamed-checkzone 211.16.172.in-addr.arpa /var/named/211.16.172.in-addr.arpa.zone
Restart DNS Service:
systemctl restart namedsystemctl status named
Let’s run a nslookup test:

Setting Up NTP Server
To ensure time synchronization across all nodes just in case internet issue as we’re running all nodes on my laptop, let’s setup NTP server Chrony.
dnf install chrony -yModify the configuration, actually just one line change:
[root@localserver ~]# cat /etc/chrony.conf...allow 172.16.211.0/24...Start the NTP Service:
systemctl restart chronydsystemctl status chronydVerify with:
❯ chronyc sources -v
  .-- Source mode  '^' = server, '=' = peer, '#' = local clock. / .- Source state '*' = current best, '+' = combined, '-' = not combined,| /             'x' = may be in error, '~' = too variable, '?' = unusable.||                                                 .- xxxx [ yyyy ] +/- zzzz||      Reachability register (octal) -.           |  xxxx = adjusted offset,||      Log2(Polling interval) --.      |          |  yyyy = measured offset,||                                \     |          |  zzzz = estimated error.||                                 |    |           \MS Name/IP address         Stratum Poll Reach LastRx Last sample===============================================================================^? 65-100-46-164.dia.static>     1   6   377    16    -33ms[  -33ms] +/- 47ms^? ntp3.radio-sunshine.org       2   6   377    15    -81ms[  -81ms] +/- 120ms^? server.slakjd.com             3   6   377    16    -71ms[  -71ms] +/- 44ms^? kjsl-fmt2-net.fmt2.kjsl.>     2   6   377    16    -65ms[  -65ms] +/- 8139us^? localserver.dev.geekcodi>     0   6     0     - +0ns[   +0ns] +/- 0ns[root@localserver ~]#
Wrapping Up
At this point, our localserver is now running DNS and NTP services 🚀
In Part 3, I will:
- Configure a Kubernetes base image
- Spin up the master node and 4 worker nodes with the Kubernetes base image
- Setup the K8s Master Node
- Join the worker nodes to the cluster
Stay tuned, and let’s keep this cluster rolling! 🚀🔥