# Ultimate Kubernetes Tutorial Part 3: A Streamlined Kubernetes cluster setup
Table of Contents
Introduction
Welcome back to the Kubernetes tutorial series! Now that our base image and local server are ready, it’s time for the real action—Kubernetes cluster setup with Flannel. I’ll spin up one Kubernetes master and 4 worker nodes, forming a local Kubernetes cluster that’s ready for real workloads. No more theory—let’s build something real! 🚀
Clone baseimage to k8s-1 as The Kubernetes VM Base Image
Before jump on our Kubernetes cluster setup, let’s start from my Mac’s terminal, clone from Base Image - Rocky 9 as k8s-base:
❯ vmrun clone /Users/geekcoding101.com/Virtual\ Machines.localized/baseimage-rocky9.vmwarevm/baseimage-rocky9.vmx /Users/geekcoding101.com/Virtual\ Machines.localized/k8s-1.vmwarevm/k8s-1.vmx full❯ sed -i '' 's/displayName = "Clone of baseimage-rocky9"/displayName = "k8s-1"/' "/Users/geekcoding101.com/Virtual Machines.localized/k8s-1.vmwarevm/k8s-1.vmx"Make sure you’ve stopped the baseimage VM, start the k8s-base VM.
The steps here I’ve mentioned details in Part 2, in short, after above command, we need to rescan in VMFusion and SSH as root into the k8s-base using the IP172.16.211.3 of the base VM, preapre the input file /opt/share_tools/init_data/k8s-1_vm_input.json:
{ "hostname": "k8s-1", "ip": "172.16.8.11", "subnet": "24", "gateway": "172.16.211.2", "dns1": "172.16.211.100", "dns2": "8.8.8.8", "domain": "dev.geekcoding101local.com", "ansible_key_path": "~/.ssh/ansible_ed25519", "ssh_key_path": "~/.ssh/ssh_ed25519"}Then using VMFusion console to login into the VM, perform below command to generate SSH keys and setup networking:
ansible-playbook /opt/share_tools/bin/configure_vm.yml -e "input_file_path=/opt/share_tools/init_data/k8s-1_vm_input.json"Now I can connect from SSH passwordlessly via the new IP 172.16.8.11.
Test DNS
Please note here is testing our local DNS server to ensure it’s working in our Kubernetes cluster setup. But it’s not going to replace CoreDNS…
Anyway, ensure the DNS server localserver(172.16.211.100) we setup in Part 2 is running.
Ensure the 172.16.211.100 is on top of /etc/resolv.conf , should be same as below:
❯ cat /etc/resolv.conf# Generated by NetworkManagersearch localdomain dev.geekcoding101local.comnameserver 172.16.211.100nameserver 8.8.8.8nameserver 172.16.68.2The 172.16.68.2 is assigned by ens224, the network adapter we added into VM for internet access. BecauseVMware Fusion typically assigns 172.16.68.1 and 172.16.68.2 as DNS servers for virtual machines when using NAT (Network Address Translation) networking.
Test DNS and hostname as below as root:
nslookup k8s-1nslookup k8s-1.dev.geekcoding101local.comhostname -fhostname -s
Setup Docker
In k8s-1 SSH session, now we can install common packages required by Kubernetes cluster setup.
In this Kubernetes cluster setup, we will use k8s-1 as a base image, so we can easily clone it as k8s-2, k8s-3, k8s-4 and k8s-5 without repeat the common packages installation!
dnf update -y
dnf config-manager --add-repo=https://download.docker.com/linux/centos/docker-ce.repodnf install docker-ce docker-ce-cli containerd.io socat -ysystemctl enable --now docker
systemctl start dockersystemctl status docker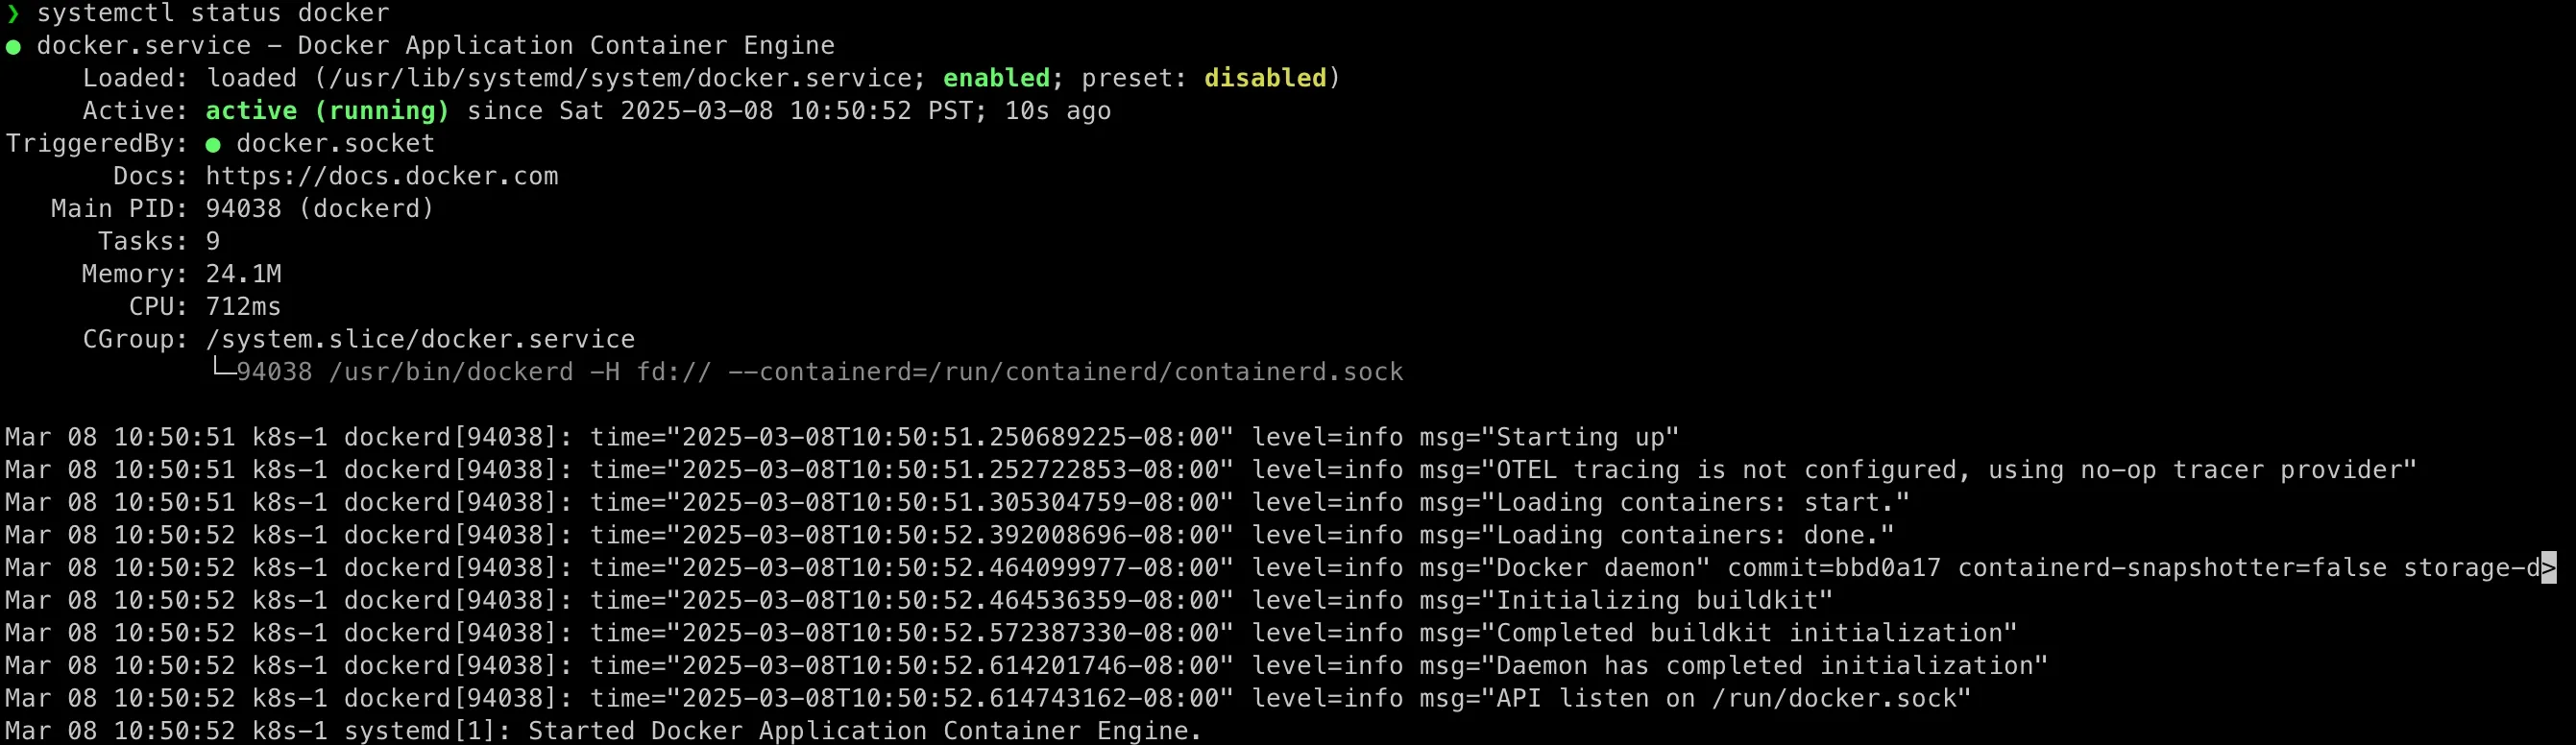
Execute Docker Command Without sudo As Non-root Accounts
If running as a non-root account, you will encounter this permission error:
[admin@k8s-01 ~]$ docker pspermission denied while trying to connect to the Docker daemon socket at unix:///var/run/docker.sock: Get "http://%2Fvar%2Frun%2Fdocker.sock/v1.47/containers/json": dial unix /var/run/docker.sock: connect: permission denied[admin@k8s-01 ~]$So let’s add the use into docker group:
[admin@k8s-1 ~]$ sudo usermod -aG docker $(whoami)Log out of the current session and log in again as admin and you should see docker ps started working now.
Let’s test docker (how about switch back to root account to perform the testing…):
docker run hello-world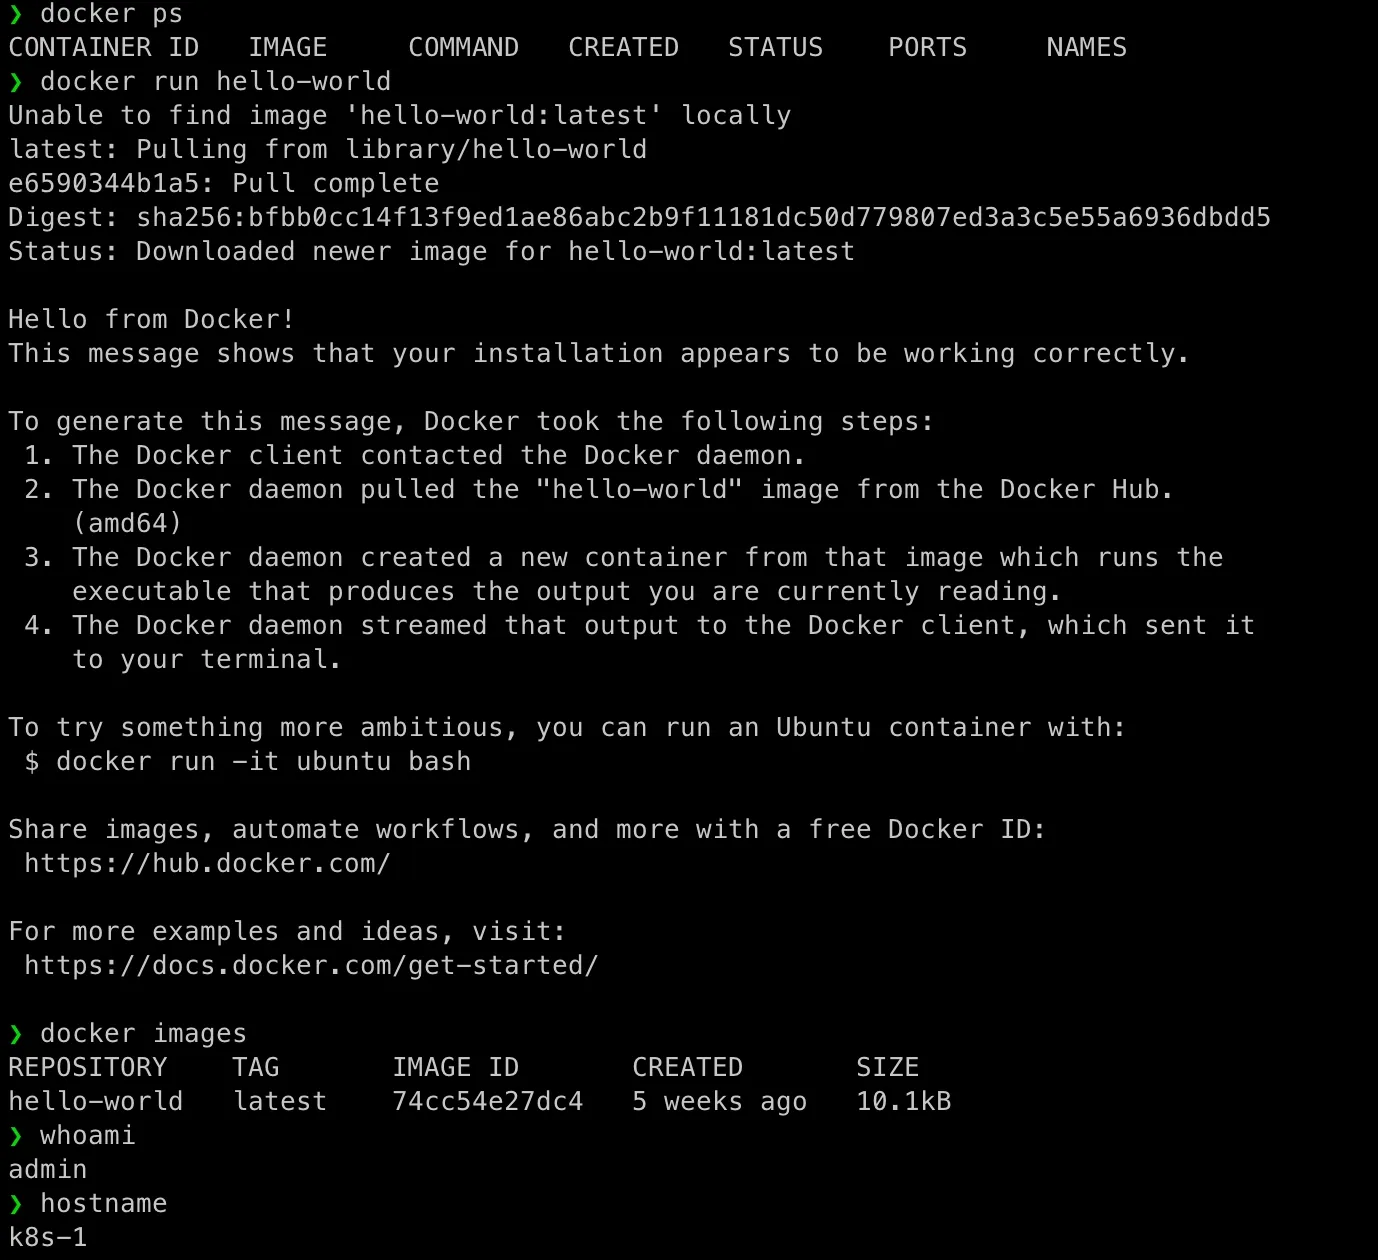
Configure OS To Support Kubernetes
Disable swap for Kubernetes
swapoff -ased -i '/swap/d' /etc/fstabConfigure Linux kernel’s networking parameters
br_netfilter: Kubernetes uses network bridges to connect Pods, and the br_netfilter module ensures that iptables can see and manipulate bridged traffic. This is essential for Kubernetes’ internal networking (such as inter-Pod communication and service routing).
Overlay in /etc/modules-load.d/k8s.conf: is not needed on rocky 9. Because I found it’s already loaded:
❯ modinfo overlayfilename: /lib/modules/5.14.0-427.37.1.el9_4.x86_64/kernel/fs/overlayfs/overlay.ko.xzalias: fs-overlaylicense: GPLdescription: Overlay filesystemauthor: Miklos Szeredi <miklos@szeredi.hu>rhelversion: 9.4srcversion: 6DB4565DD58AB453DBFAD2Adepends:retpoline: Yintree: Yname: overlayvermagic: 5.14.0-427.37.1.el9_4.x86_64 SMP preempt mod_unload modversionssig_id: PKCS#7signer: Rocky kernel signing keysig_key: 52:A7:4C:F4:7A:B4:B1:12:D3:1E:72:33:0A:0D:49:8B:C3:34:88:DCsig_hashalgo: sha256signature: 18:AF:F5:F2:12:80:5A:92:B3:5E:29:B2:A5:10:E8:27:90:73:B4:B2: 25:B0:04:42:2B:28:FF:86:50:0D:82:CA:12:68:93:70:9F:04:C5:3C: 19:B2:29:47:41:DD:7F:1D:33:18:33:B7:50:2C:30:A4:0D:CB:1E:53: 4A:66:B8:BF:CB:41:F8:89:3E:5E:CA:63:8B:0C:2F:CD:42:AD:63:9D: C4:6A:31:FD:4B:46:0C:33:38:5A:BA:11:B0:66:76:BF:54:7B:B7:63: 35:1B:76:52:D2:04:BF:83:65:A7:C6:0D:D1:CB:96:BF:60:37:54:37: 3E:1B:76:69:9C:2F:8F:8D:81:21:88:33:96:EA:E6:C3:97:D1:1E:8F: BC:BD:70:82:27:2A:F3:8C:11:1D:AC:AC:13:00:F6:CD:00:BD:6C:3E: 40:6F:F2:54:9C:E3:62:A7:17:78:4C:3C:43:A0:49:4D:61:FE:FD:A6: CD:51:5F:E6:F3:47:B7:70:D4:5E:55:3C:B8:8C:D5:45:81:6F:47:E4: 80:39:E1:BA:0D:79:21:64:A6:7E:4D:ED:59:09:F1:26:D2:06:98:E5: EB:E5:B1:58:F5:AF:89:0B:0E:8B:65:EB:2A:83:30:48:FD:AC:48:AB: 12:39:EF:3C:BB:DA:CC:26:F8:38:7F:C8:2D:15:7D:4D:3A:E6:8F:AA: AB:16:79:39:2D:2E:9D:5B:76:29:6F:BE:74:4E:65:F5:1F:01:43:58: DE:12:54:B5:C7:9E:A5:4C:B0:1D:5E:9B:05:AF:CF:B8:33:28:B4:8E: 6E:A1:E1:58:7D:CC:F2:61:51:EA:B1:C0:BD:BE:02:56:43:6D:5A:67: D7:F0:25:02:91:70:74:AE:F4:6F:D3:E9:9A:1E:D0:DD:BA:C2:3C:B3: 07:C4:F3:AD:37:63:6B:2B:B9:1D:FB:0B:CC:0B:B7:E3:14:EA:2E:28: D7:56:97:88:91:A5:3F:59:5D:21:7E:88:EA:AB:49:E3:3B:77:5B:F3: 9F:56:EE:46parm: check_copy_up:Obsolete; does nothingparm: redirect_max:Maximum length of absolute redirect xattr value (ushort)parm: redirect_dir:Default to on or off for the redirect_dir feature (bool)parm: redirect_always_follow:Follow redirects even if redirect_dir feature is turned off (bool)parm: index:Default to on or off for the inodes index feature (bool)parm: nfs_export:Default to on or off for the NFS export feature (bool)parm: xino_auto:Auto enable xino feature (bool)parm: metacopy:Default to on or off for the metadata only copy up feature (bool)❯ cd /lib/modules/$(uname -r)/kernel/fs/overlayfs❯ lsoverlay.ko.xzbridge-nf-call-iptables: Without this, if iptables is not configured to handle bridged traffic, the network policies and traffic filtering between pods and services may not work correctly.
So now perform the configuration for above:
❯ modprobe br_netfilter❯ echo '1' > /proc/sys/net/bridge/bridge-nf-call-iptables❯ tee /etc/modules-load.d/k8s.conf <<EOFbr_netfilterEOFbr_netfilter❯ tee /etc/sysctl.d/k8s.conf <<EOFnet.ipv4.ip_forward = 1net.bridge.bridge-nf-call-ip6tables = 1net.bridge.bridge-nf-call-iptables = 1EOF❯ sysctl --systemYou might see some articles configured "ip_vs, ip_vs_rr, ip_vs_wrr, ip_vs_sh" in modules-load.d/k8s.conf, however, they’re required by ipvs but we’re suing iptables. Using iptables is easier comparing with ipvs in development environment. In a scale environment, iptables struggles to scale to tens of thousands of Services because it is designed purely for firewalling purposes and is based on in-kernel rule lists.
I’ve seen several artiles talking Kubernetes cluster setup disabled firewalld, just want to remind that, disabling firewalld does not affect the need for proper kernel network module configuration as shown in above and network filtering for bridged traffic. The above commands are critical for Kubernetes networking.
Install Kubernetes Packages
cat <<EOF | tee /etc/yum.repos.d/k8s.repo[kubernetes]name=Kubernetesbaseurl=https://pkgs.k8s.io/core:/stable:/v1.29/rpm/enabled=1gpgcheck=1gpgkey=https://pkgs.k8s.io/core:/stable:/v1.29/rpm/repodata/repomd.xml.keyexclude=kubelet kubeadm kubectl cri-tools kubernetes-cniEOF
dnf makecache# disableexcludes ensures that packages from the Kubernetes repository are not excluded during installation.dnf install -y kubelet kubeadm kubectl --disableexcludes=kubernetes
systemctl enable kubelet && systemctl start kubelet && systemctl status kubelet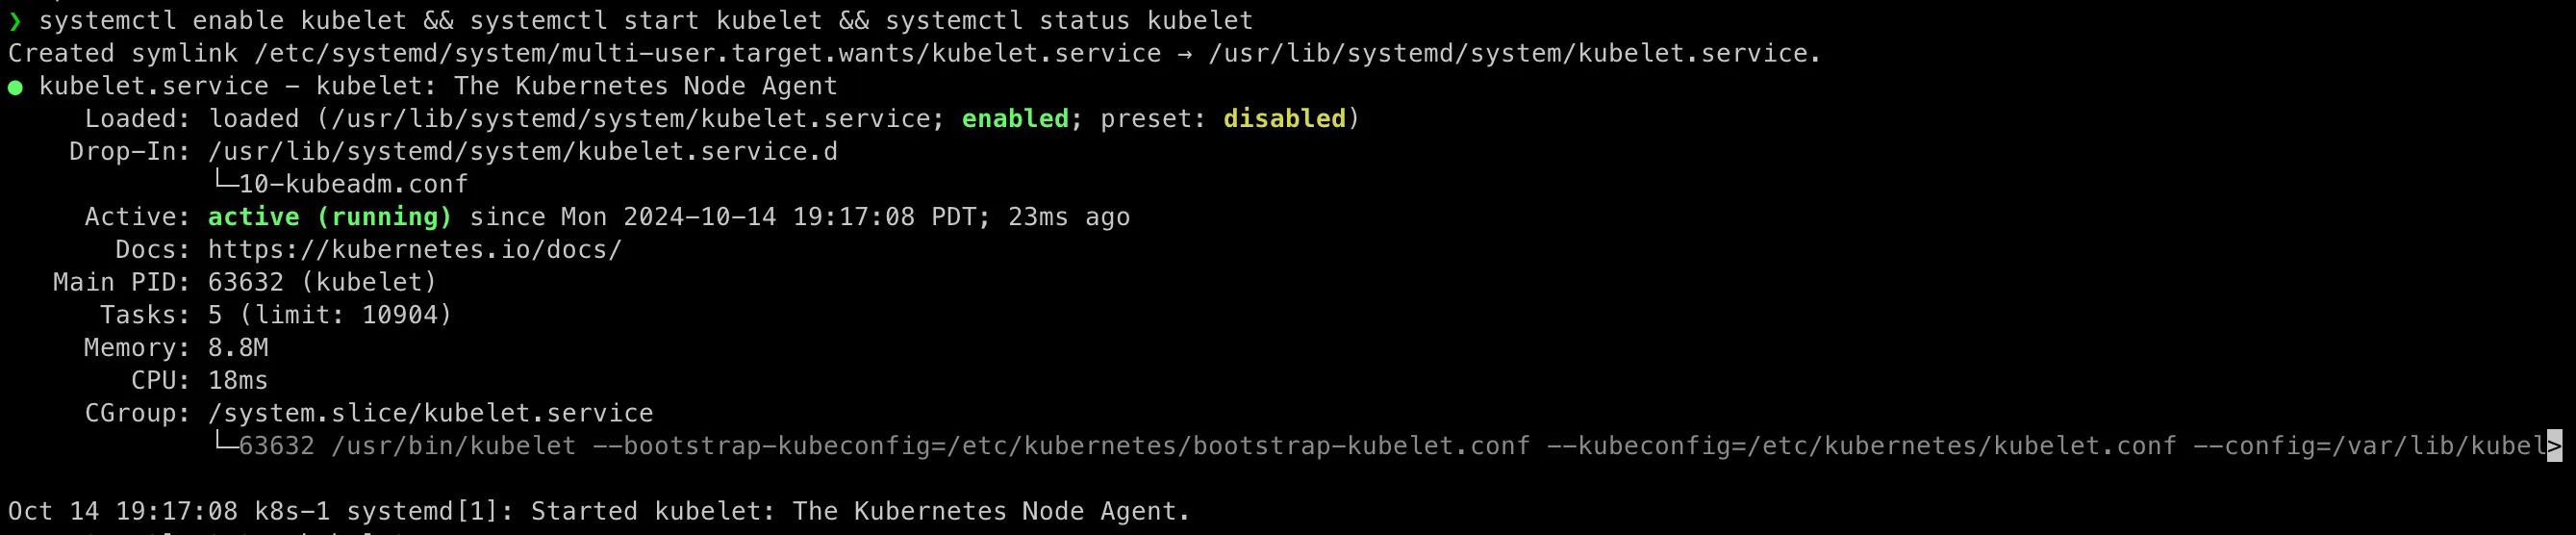
Enable Firewalld
You remember, we’ve disabled firewalld in Part 1: Setting Up a Thriving Multi-Node Cluster on Mac ? We need to enable it now in our Kuberentes cluster setup as I want my environment running in a production-similar environment.
Open Required Ports
| Port(s) | Description |
|---|---|
| 6443 | Kubernetes API server |
| 2379-2380 | etcd server client API |
| 10250 | Kubelet API |
| 10251 | kube-scheduler |
| 10252 | kube-controller-manager |
| 10255 | Read-only Kubelet API |
| 5473 | Cluster Control Plane Config API |
systemctl unmask firewalldsystemctl start firewalld
firewall-cmd --zone=public --permanent --add-port=6443/tcpfirewall-cmd --zone=public --permanent --add-port=2379-2380/tcpfirewall-cmd --zone=public --permanent --add-port=10250/tcpfirewall-cmd --zone=public --permanent --add-port=10251/tcpfirewall-cmd --zone=public --permanent --add-port=10252/tcpfirewall-cmd --zone=public --permanent --add-port=10255/tcpfirewall-cmd --zone=public --permanent --add-port=5473/tcp
firewall-cmd --zone=public --permanent --list-portsPull Images with crictl
As admin account, perform:
sudo kubeadm config images pull
So now we have Kubernetes images for our Kubernetes cluster setup.
Hey, just want to remind here, we can only use crictl to manage images for Kubernetes, because our Kubernetes using containerd instead of Docker as the container runtime. And crictl needs to access /run/containerd/containerd.sock owned by root:root, so please remember to use sudo if you logged in as non-root account:
[caption id=“attachment_4915” align=“aligncenter” width=“1468”]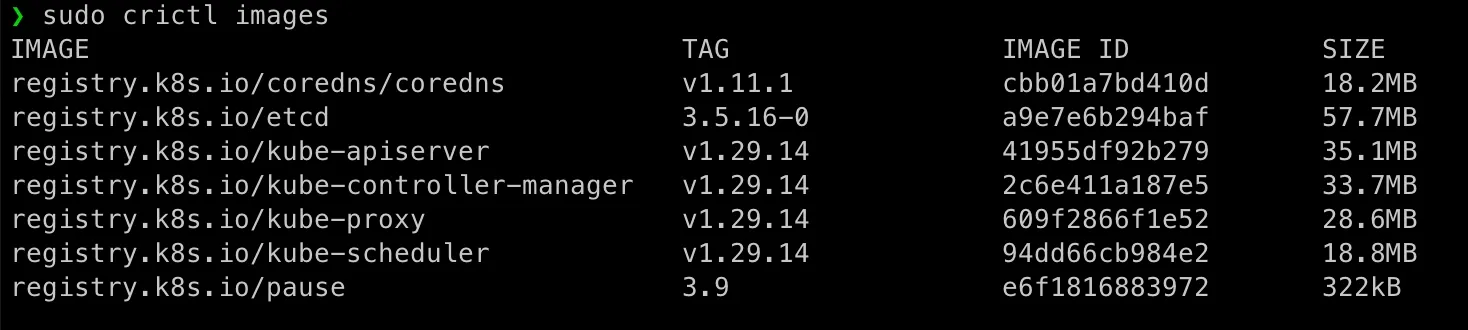 Checking Docker images (it only has the
 hello-world image which pulled before when we’re testing docker):[/caption]
❯ sudo docker images[sudo] password for admin:REPOSITORY TAG IMAGE ID CREATED SIZEhello-world latest d2c94e258dcb 17 months ago 13.3kBCreate Kubernetes Worker Nodes
We have get our Kubernetes base image k8s-1 ready!
Before we further configure k8s-1 as our master node, now it’s time shutdown it and clone it as k8s-base-image:
❯ vmrun clone /Users/geekcoding101.com/Virtual\ Machines.localized/k8s-1.vmwarevm/k8s-1.vmx  /Users/geekcoding101.com/Virtual\ Machines.localized/k8s-base-image.vmwarevm/k8s-base-image.vmx full
❯ sed -i '' 's/displayName = "Clone of k8s-1"/displayName = "k8s-base-image"/' "/Users/geekcoding101.com/Virtual Machines.localized/k8s-base-image.vmwarevm/k8s-base-image.vmx"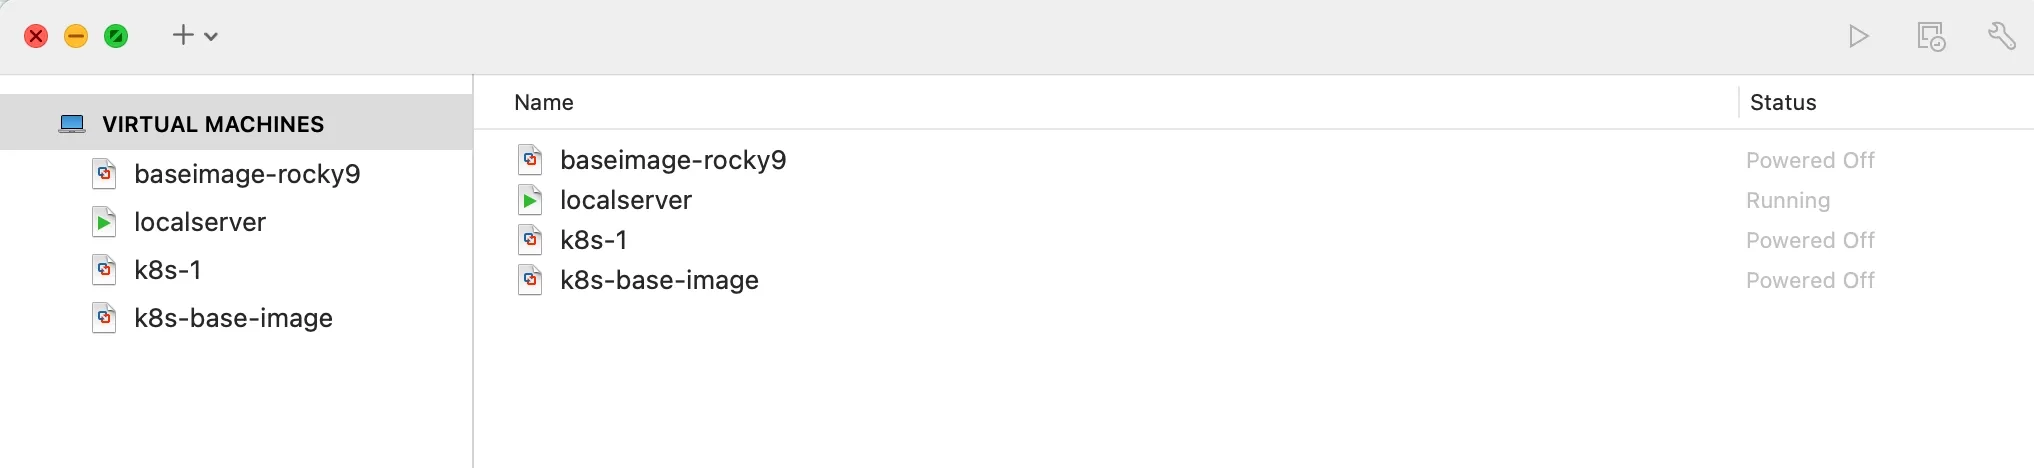
Then repeat the steps mentioned in Clone baseimage to k8s-1 as The Kubernetes VM Base Image, clone k8s-base-image to k8s-2, k8s-3, k8s-4 and k8s-5 in our Kubernetes cluster setup.
vmrun clone /Users/geekcoding101.com/Virtual\ Machines.localized/k8s-1.vmwarevm/k8s-1.vmx  /Users/geekcoding101.com/Virtual\ Machines.localized/k8s-base-image.vmwarevm/k8s-base-image.vmx fullsed -i '' 's/displayName = "Clone of k8s-1"/displayName = "k8s-base-image"/' "/Users/geekcoding101.com/Virtual Machines.localized/k8s-base-image.vmwarevm/k8s-base-image.vmx"
vmrun clone /Users/geekcoding101.com/Virtual\ Machines.localized/k8s-base-image.vmwarevm/k8s-base-image.vmx  /Users/geekcoding101.com/Virtual\ Machines.localized/k8s-2.vmwarevm/k8s-2.vmx fullsed -i '' 's/displayName = "Clone of k8s-base-image"/displayName = "k8s-2"/' "/Users/geekcoding101.com/Virtual Machines.localized/k8s-2.vmwarevm/k8s-2.vmx"
vmrun clone /Users/geekcoding101.com/Virtual\ Machines.localized/k8s-base-image.vmwarevm/k8s-base-image.vmx  /Users/geekcoding101.com/Virtual\ Machines.localized/k8s-3.vmwarevm/k8s-3.vmx fullsed -i '' 's/displayName = "Clone of k8s-base-image"/displayName = "k8s-3"/' "/Users/geekcoding101.com/Virtual Machines.localized/k8s-3.vmwarevm/k8s-3.vmx"
vmrun clone /Users/geekcoding101.com/Virtual\ Machines.localized/k8s-base-image.vmwarevm/k8s-base-image.vmx  /Users/geekcoding101.com/Virtual\ Machines.localized/k8s-4.vmwarevm/k8s-4.vmx fullsed -i '' 's/displayName = "Clone of k8s-base-image"/displayName = "k8s-4"/' "/Users/geekcoding101.com/Virtual Machines.localized/k8s-4.vmwarevm/k8s-4.vmx"
vmrun clone /Users/geekcoding101.com/Virtual\ Machines.localized/k8s-base-image.vmwarevm/k8s-base-image.vmx  /Users/geekcoding101.com/Virtual\ Machines.localized/k8s-5.vmwarevm/k8s-5.vmx fullsed -i '' 's/displayName = "Clone of k8s-base-image"/displayName = "k8s-5"/' "/Users/geekcoding101.com/Virtual Machines.localized/k8s-5.vmwarevm/k8s-5.vmx"
Recan in VMFusion, you will see:
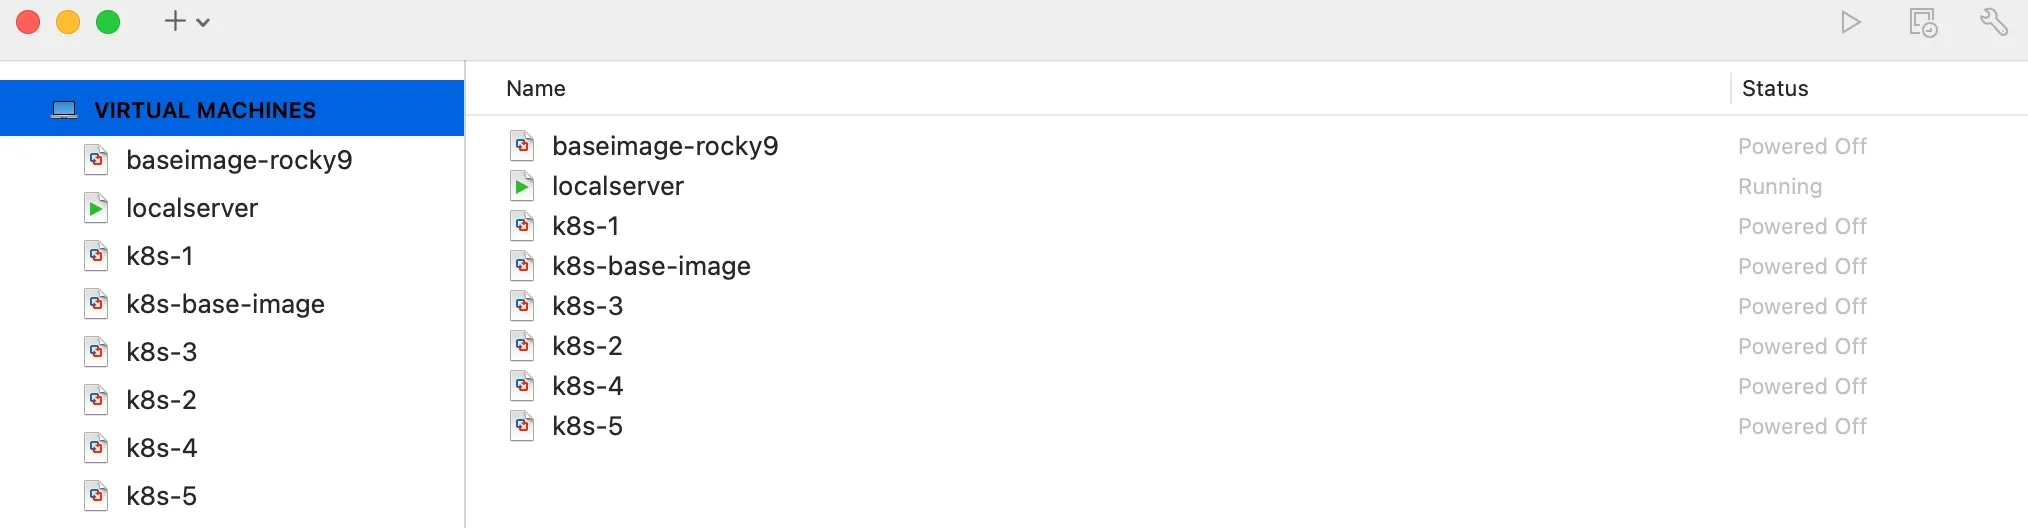
Remember to customize each node one by one with different input.json (A kind reminder, before configuring network, k8s-2 to k8s-5 will use the same IP 172.16.211.11 of k8s-1, so please shutdown k8s-1 before finish configuration on k8s-2 to k8s-5, and localserver should be running as well). I put the all input.json here so you can copy it (My bad! I should have prepared those files in baseimage!):
❯ ls /opt/share_tools/init_datadevbox_vm_input.json  k8s-1_vm_input.json  k8s-2_vm_input.json  k8s-3_vm_input.json  k8s-4_vm_input.json  k8s-5_vm_input.json  localserver_vm_input.json❯ cat /opt/share_tools/init_data/k8s-2_vm_input.json{  "hostname": "k8s-2",  "ip": "172.16.211.12",  "subnet": "24",  "gateway": "172.16.211.2",  "dns1": "172.168.211.100",  "dns2": "8.8.8.8",  "domain": "dev.geekcoding101local.com",  "ansible_key_path": "~/.ssh/ansible_ed25519",  "ssh_key_path": "~/.ssh/ssh_ed25519"}
❯ cat /opt/share_tools/init_data/k8s-3_vm_input.json{  "hostname": "k8s-3",  "ip": "172.16.211.13",  "subnet": "24",  "gateway": "172.16.211.2",  "dns1": "172.168.211.100",  "dns2": "8.8.8.8",  "domain": "dev.geekcoding101local.com",  "ansible_key_path": "~/.ssh/ansible_ed25519",  "ssh_key_path": "~/.ssh/ssh_ed25519"}
❯ cat /opt/share_tools/init_data/k8s-4_vm_input.json{  "hostname": "k8s-4",  "ip": "172.16.211.14",  "subnet": "24",  "gateway": "172.16.211.2",  "dns1": "172.168.211.100",  "dns2": "8.8.8.8",  "domain": "dev.geekcoding101local.com",  "ansible_key_path": "~/.ssh/ansible_ed25519",  "ssh_key_path": "~/.ssh/ssh_ed25519"}
❯ cat /opt/share_tools/init_data/k8s-5_vm_input.json{  "hostname": "k8s-5",  "ip": "172.16.211.15",  "subnet": "24",  "gateway": "172.16.211.2",  "dns1": "172.168.211.100",  "dns2": "8.8.8.8",  "domain": "dev.geekcoding101local.com",  "ansible_key_path": "~/.ssh/ansible_ed25519",  "ssh_key_path": "~/.ssh/ssh_ed25519"}
Then run nslookup and ping command to make sure network has no problem in this Kubernetes cluster setup.
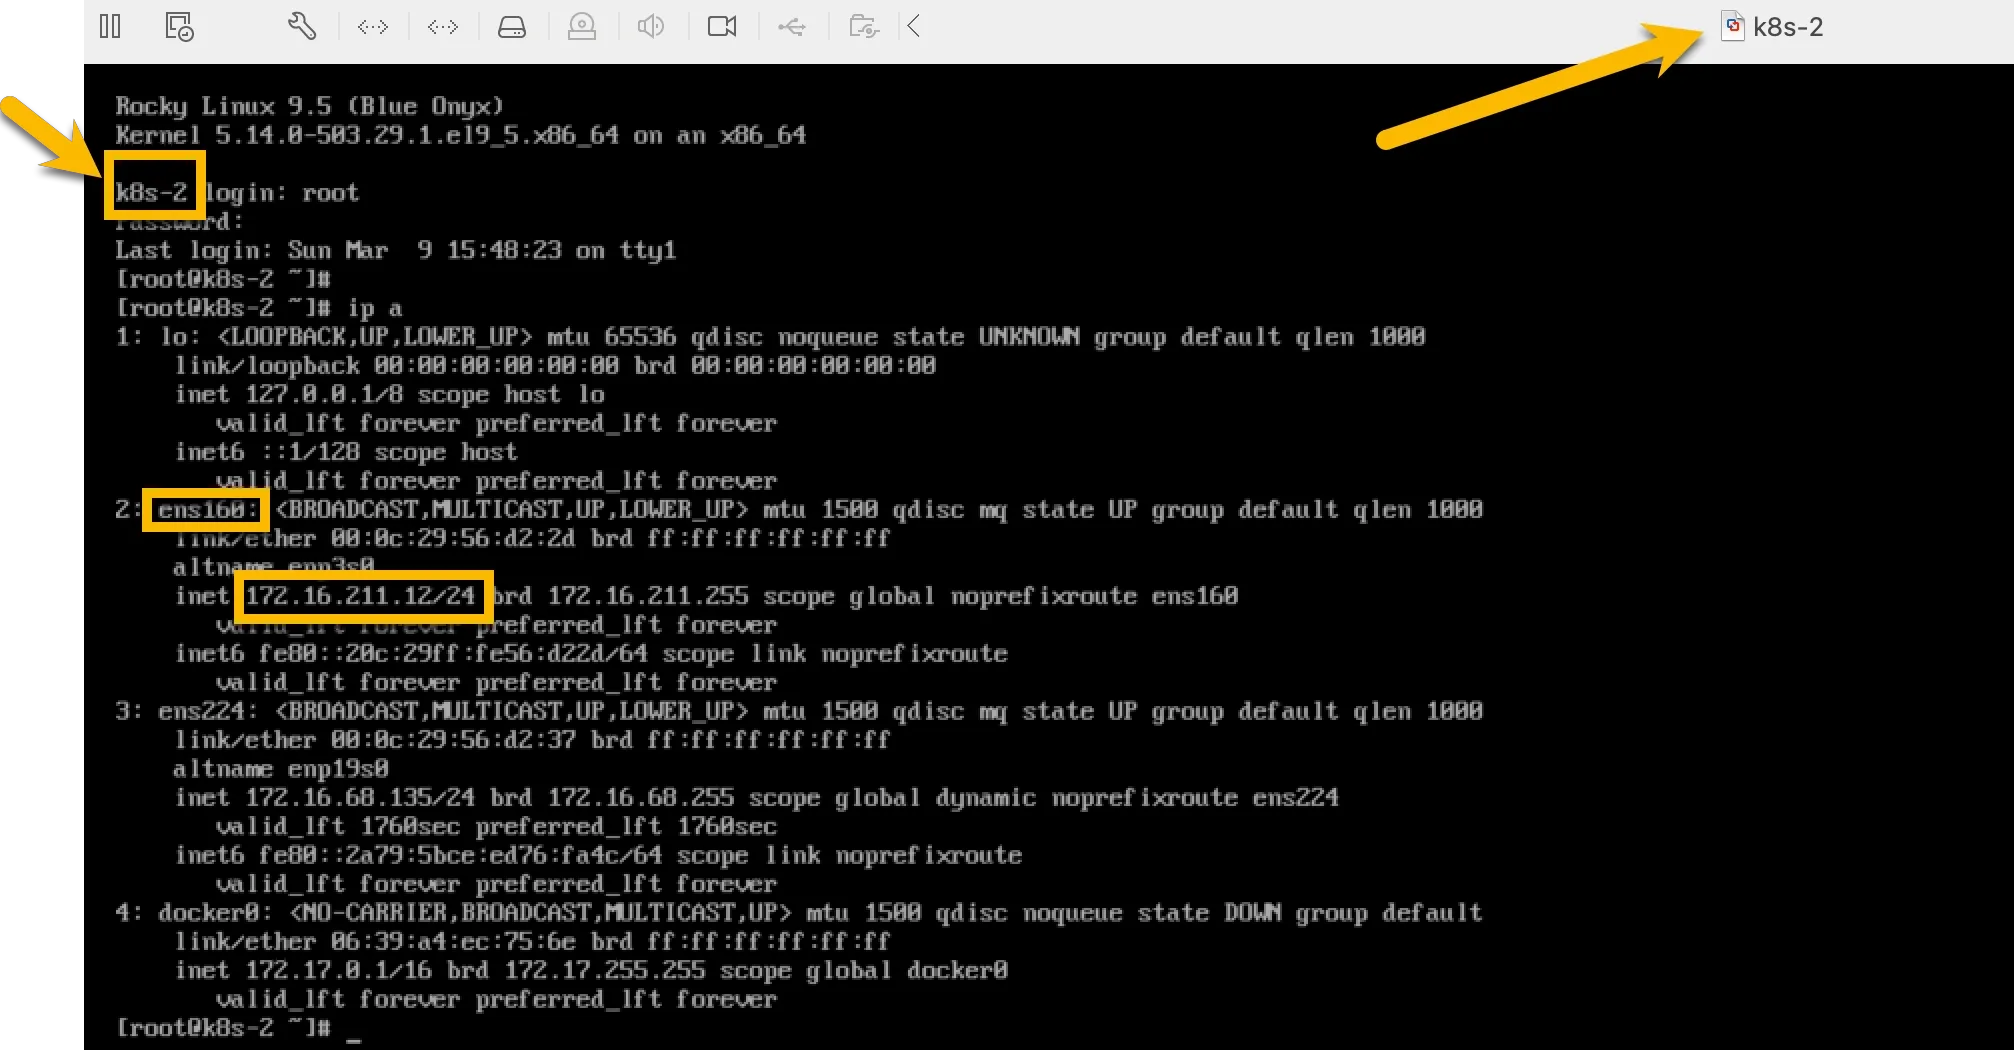
For example, when first time start k8s-2, you will see it’s using k8s-1 as hostname and its IP:
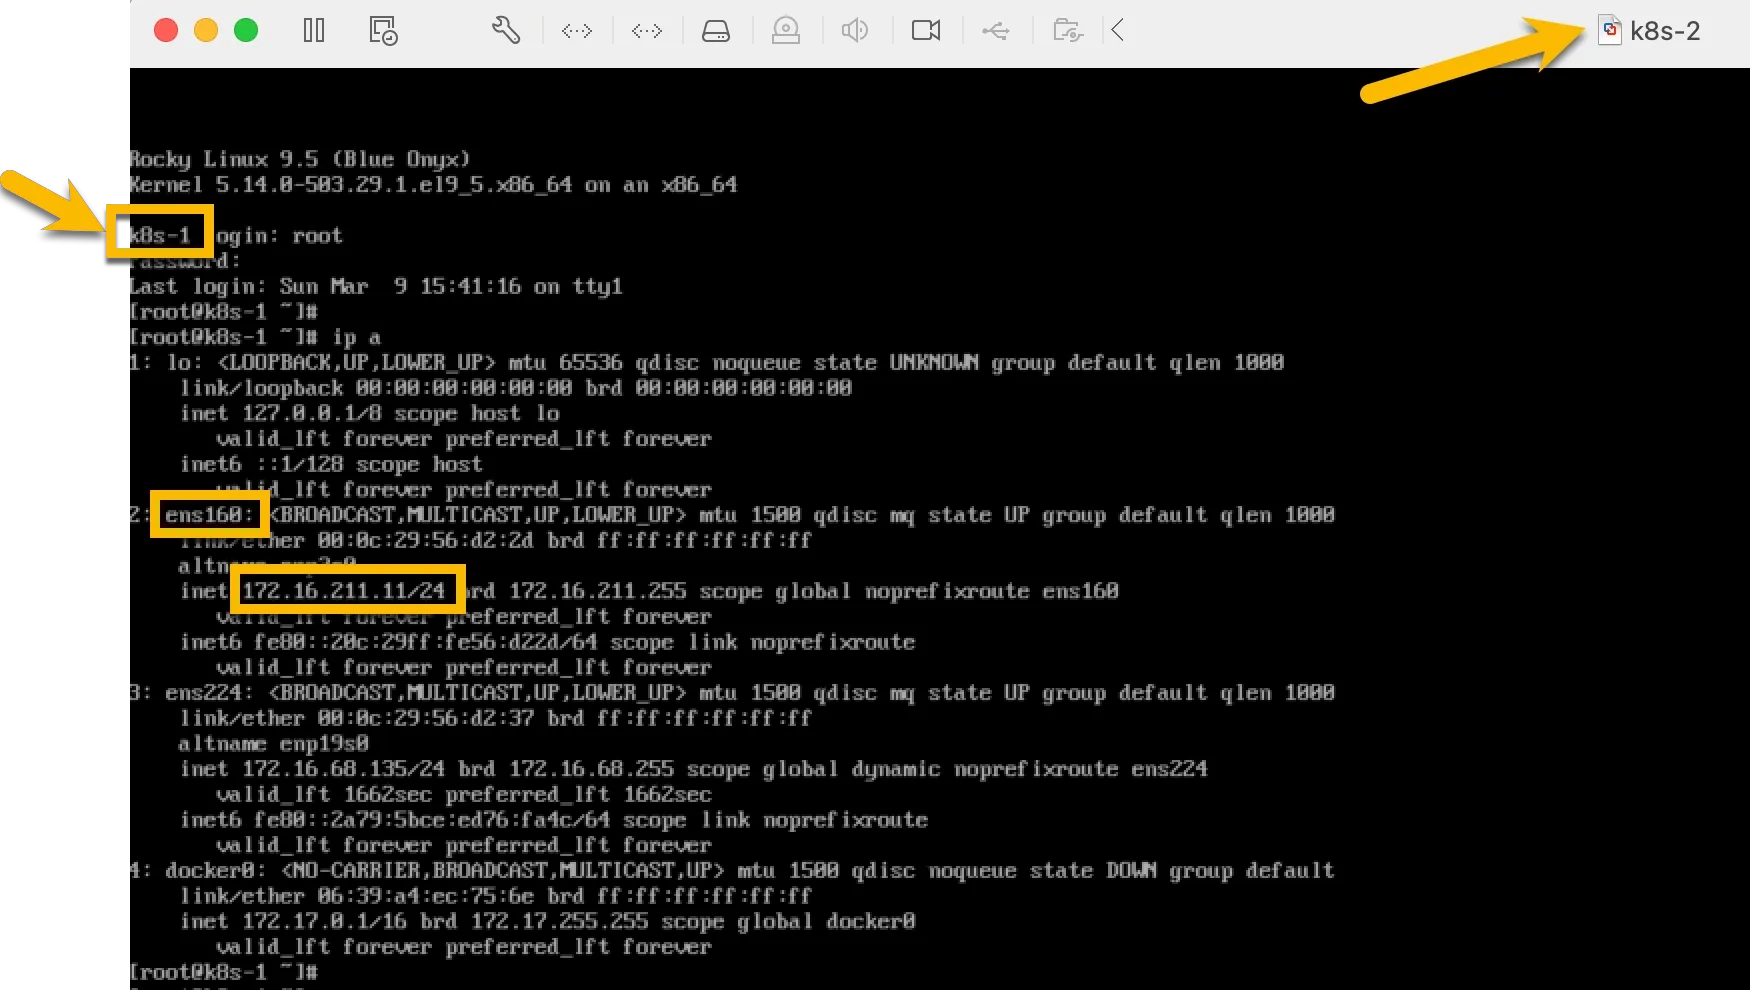 After perform the ansible script, logout and log in again as root:
Setup Kubernetes Master Node k8s-1
I know it’s kind of unbelievable that we have prepared so much for this Kubernetes cluster setup but the actual steps to form the master and join worker nodes are just two or three commands…
Run sudo kubeadm init on Master Node
sudo kubeadm init --pod-network-cidr=10.244.0.0/16 --service-cidr=10.96.0.0/12❯ sudo kubeadm init --pod-network-cidr=10.244.0.0/16 --service-cidr=10.96.0.0/12[sudo] password for admin:W0308 22:24:40.483800 123896 version.go:104] could not fetch a Kubernetes version from the internet: unable to get URL "https://dl.k8s.io/release/stable-1.txt": Get "https://cdn.dl.k8s.io/release/stable-1.txt": context deadline exceeded (Client.Timeout exceeded while awaiting headers)W0308 22:24:40.483994 123896 version.go:105] falling back to the local client version: v1.29.14[init] Using Kubernetes version: v1.29.14[preflight] Running pre-flight checks [WARNING Firewalld]: firewalld is active, please ensure ports [6443 10250] are open or your cluster may not function correctly[preflight] Pulling images required for setting up a Kubernetes cluster[preflight] This might take a minute or two, depending on the speed of your internet connection[preflight] You can also perform this action in beforehand using 'kubeadm config images pull'W0308 22:24:40.834473 123896 checks.go:835] detected that the sandbox image "registry.k8s.io/pause:3.8" of the container runtime is inconsistent with that used by kubeadm. It is recommended that using "registry.k8s.io/pause:3.9" as the CRI sandbox image.[certs] Using certificateDir folder "/etc/kubernetes/pki"[certs] Generating "ca" certificate and key[certs] Generating "apiserver" certificate and key[certs] apiserver serving cert is signed for DNS names [k8s-1 kubernetes kubernetes.default kubernetes.default.svc kubernetes.default.svc.cluster.local] and IPs [10.96.0.1 172.16.211.11][certs] Generating "apiserver-kubelet-client" certificate and key[certs] Generating "front-proxy-ca" certificate and key[certs] Generating "front-proxy-client" certificate and key[certs] Generating "etcd/ca" certificate and key[certs] Generating "etcd/server" certificate and key[certs] etcd/server serving cert is signed for DNS names [k8s-1 localhost] and IPs [172.16.211.11 127.0.0.1 ::1][certs] Generating "etcd/peer" certificate and key[certs] etcd/peer serving cert is signed for DNS names [k8s-1 localhost] and IPs [172.16.211.11 127.0.0.1 ::1][certs] Generating "etcd/healthcheck-client" certificate and key[certs] Generating "apiserver-etcd-client" certificate and key[certs] Generating "sa" key and public key[kubeconfig] Using kubeconfig folder "/etc/kubernetes"[kubeconfig] Writing "admin.conf" kubeconfig file[kubeconfig] Writing "super-admin.conf" kubeconfig file[kubeconfig] Writing "kubelet.conf" kubeconfig file[kubeconfig] Writing "controller-manager.conf" kubeconfig file[kubeconfig] Writing "scheduler.conf" kubeconfig file[etcd] Creating static Pod manifest for local etcd in "/etc/kubernetes/manifests"[control-plane] Using manifest folder "/etc/kubernetes/manifests"[control-plane] Creating static Pod manifest for "kube-apiserver"[control-plane] Creating static Pod manifest for "kube-controller-manager"[control-plane] Creating static Pod manifest for "kube-scheduler"[kubelet-start] Writing kubelet environment file with flags to file "/var/lib/kubelet/kubeadm-flags.env"[kubelet-start] Writing kubelet configuration to file "/var/lib/kubelet/config.yaml"[kubelet-start] Starting the kubelet[wait-control-plane] Waiting for the kubelet to boot up the control plane as static Pods from directory "/etc/kubernetes/manifests". This can take up to 4m0s[apiclient] All control plane components are healthy after 34.003550 seconds[upload-config] Storing the configuration used in ConfigMap "kubeadm-config" in the "kube-system" Namespace[kubelet] Creating a ConfigMap "kubelet-config" in namespace kube-system with the configuration for the kubelets in the cluster[upload-certs] Skipping phase. Please see --upload-certs[mark-control-plane] Marking the node k8s-1 as control-plane by adding the labels: [node-role.kubernetes.io/control-plane node.kubernetes.io/exclude-from-external-load-balancers][mark-control-plane] Marking the node k8s-1 as control-plane by adding the taints [node-role.kubernetes.io/control-plane:NoSchedule][bootstrap-token] Using token: yjfem7.na3i596dag4eogh9[bootstrap-token] Configuring bootstrap tokens, cluster-info ConfigMap, RBAC Roles[bootstrap-token] Configured RBAC rules to allow Node Bootstrap tokens to get nodes[bootstrap-token] Configured RBAC rules to allow Node Bootstrap tokens to post CSRs in order for nodes to get long term certificate credentials[bootstrap-token] Configured RBAC rules to allow the csrapprover controller automatically approve CSRs from a Node Bootstrap Token[bootstrap-token] Configured RBAC rules to allow certificate rotation for all node client certificates in the cluster[bootstrap-token] Creating the "cluster-info" ConfigMap in the "kube-public" namespace[kubelet-finalize] Updating "/etc/kubernetes/kubelet.conf" to point to a rotatable kubelet client certificate and key[addons] Applied essential addon: CoreDNS[addons] Applied essential addon: kube-proxy
Your Kubernetes control-plane has initialized successfully!
To start using your cluster, you need to run the following as a regular user:
mkdir -p $HOME/.kube sudo cp -i /etc/kubernetes/admin.conf $HOME/.kube/config sudo chown $(id -u):$(id -g) $HOME/.kube/config
Alternatively, if you are the root user, you can run:
export KUBECONFIG=/etc/kubernetes/admin.conf
You should now deploy a pod network to the cluster.Run "kubectl apply -f [podnetwork].yaml" with one of the options listed at: https://kubernetes.io/docs/concepts/cluster-administration/addons/
Then you can join any number of worker nodes by running the following on each as root:
kubeadm join 172.16.211.11:6443 --token yjfem7.na3i596dag4eogh9 \ --discovery-token-ca-cert-hash sha256:23622f60b6274309294e1693439cd9a5e897c4037baaa62d5980a64745445cacSince we’re not root, perform the steps mentioned in above in your Kubernetes cluster setup:
mkdir -p $HOME/.kubesudo cp -i /etc/kubernetes/admin.conf $HOME/.kube/configsudo chown $(id -u):$(id -g) $HOME/.kube/configVerify Kubernetes Cluster Status
Check the cluster nodes:
kubectl get nodes -o widekubectl get pods -n kube-systemYou might need to wait some minutes to see all services running, here you go:
As you see, we have pods:
- Kube-apiserver
- Kube-controller-manager
- Kube-scheduler
- Etcd
- Kube-proxy
- CoreDNS
Test basic Kubernetes commands:
kubectl cluster-infokubectl get namespaces
Deploy Flannel for Pod Networking
Are you exicited? We’re almost there to get ourKubernetes cluster setup ready!
Okay, Flannel must be installed for pods communication:
kubectl --insecure-skip-tls-verify apply -f https://github.com/flannel-io/flannel/releases/latest/download/kube-flannel.ymlThere are alternatives CNI we can choose for Kubernetes cluster setup, here I chose Flannel because it is simple and best for lightweight networking in small to medium Kubernetes cluster setup. It supports VXLAN, host-gw, or other simple encapsulation methods.
Calico has better performance and security policies support in cloud-native environments, but it’s more complex to set up than Flannel.
Weave Net is actually at a similar position as Flannel. It also supports Built-in network encryption which Flannel doesn’t offer.
But anyway, let’s focus on Flannel for now, we can explore other options in this Kubernetes cluster setup blog series later.
Set Up Worker Nodes
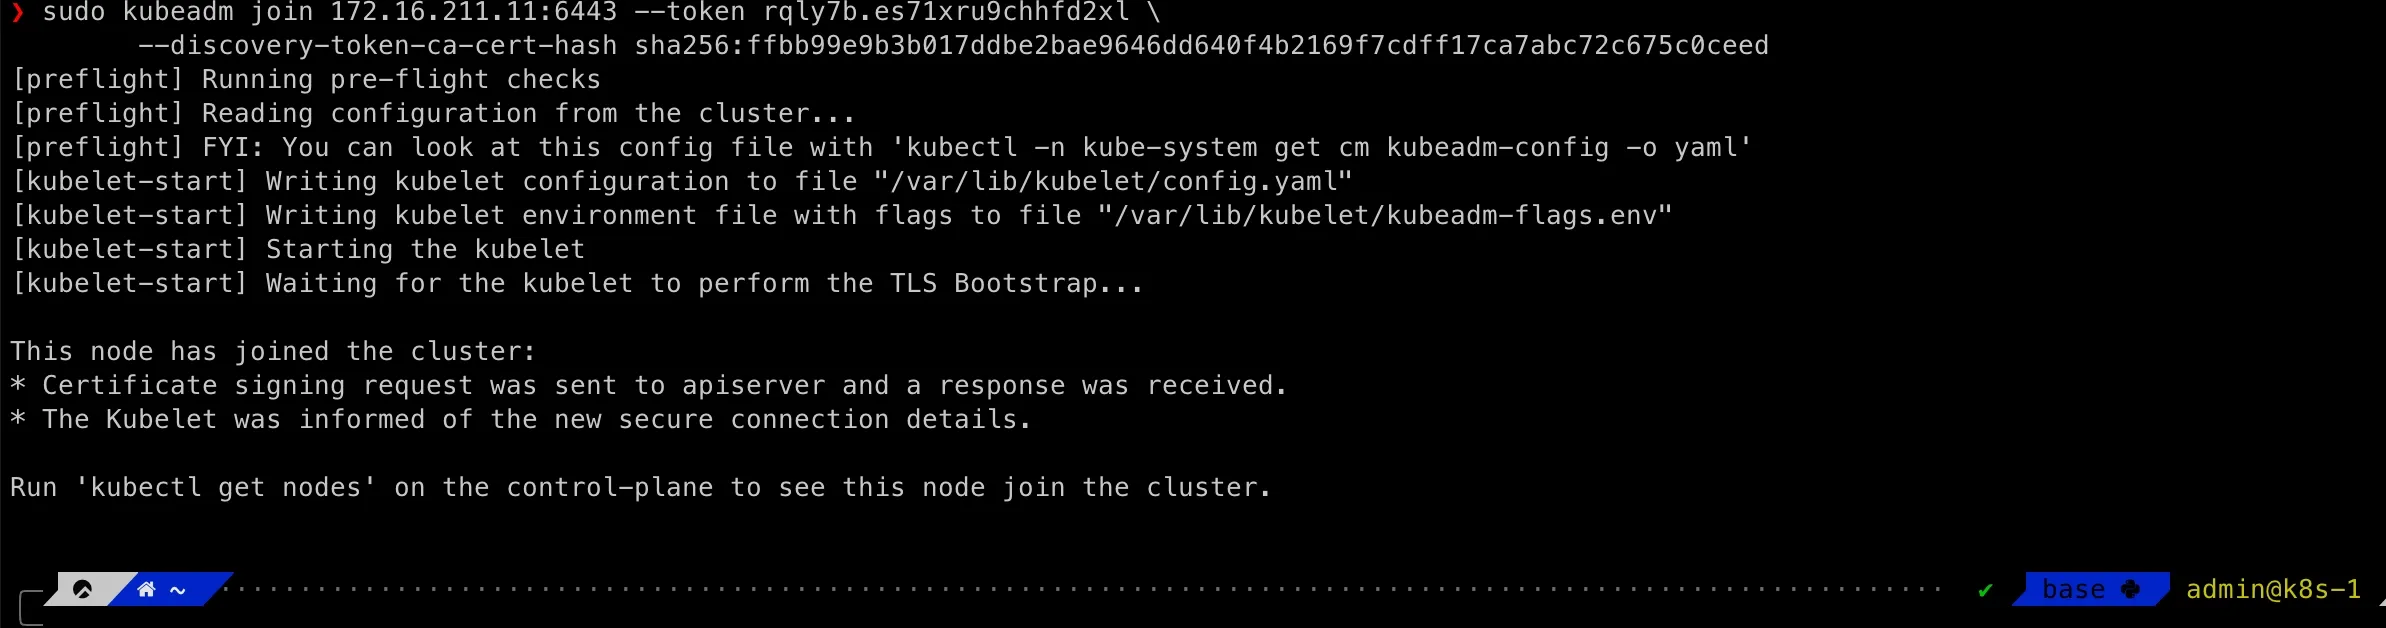
On each worker node k8s-2, k8s-3, k8s-4 and k8s-5 run as non-root account:
sudo kubeadm join 172.16.211.11:6443 --token yjfem7.na3i596dag4eogh9 \ --discovery-token-ca-cert-hash sha256:23622f60b6274309294e1693439cd9a5e897c4037baaa62d5980a64745445cacIf you need to regenerate the above join command in our Kubernetes cluster setup, go to master node as admin account:
sudo kubeadm token create --print-join-commandFor example, the screenshot from k8s-2 in my Kubernetes cluster setup:
Hold tight! This is our last step to finish theKubernetes cluster setup!
Final Steps
Now, let’s verify our Kubernetes cluster setup:
kubectl get nodes -o wideIf everything is set up correctly, all nodes should be in a Ready state. 🎉

We did!!! That’s it for this post!
Remember at the beginning of this post that we’ve observed erros in systemctl status kubelet, check it again:
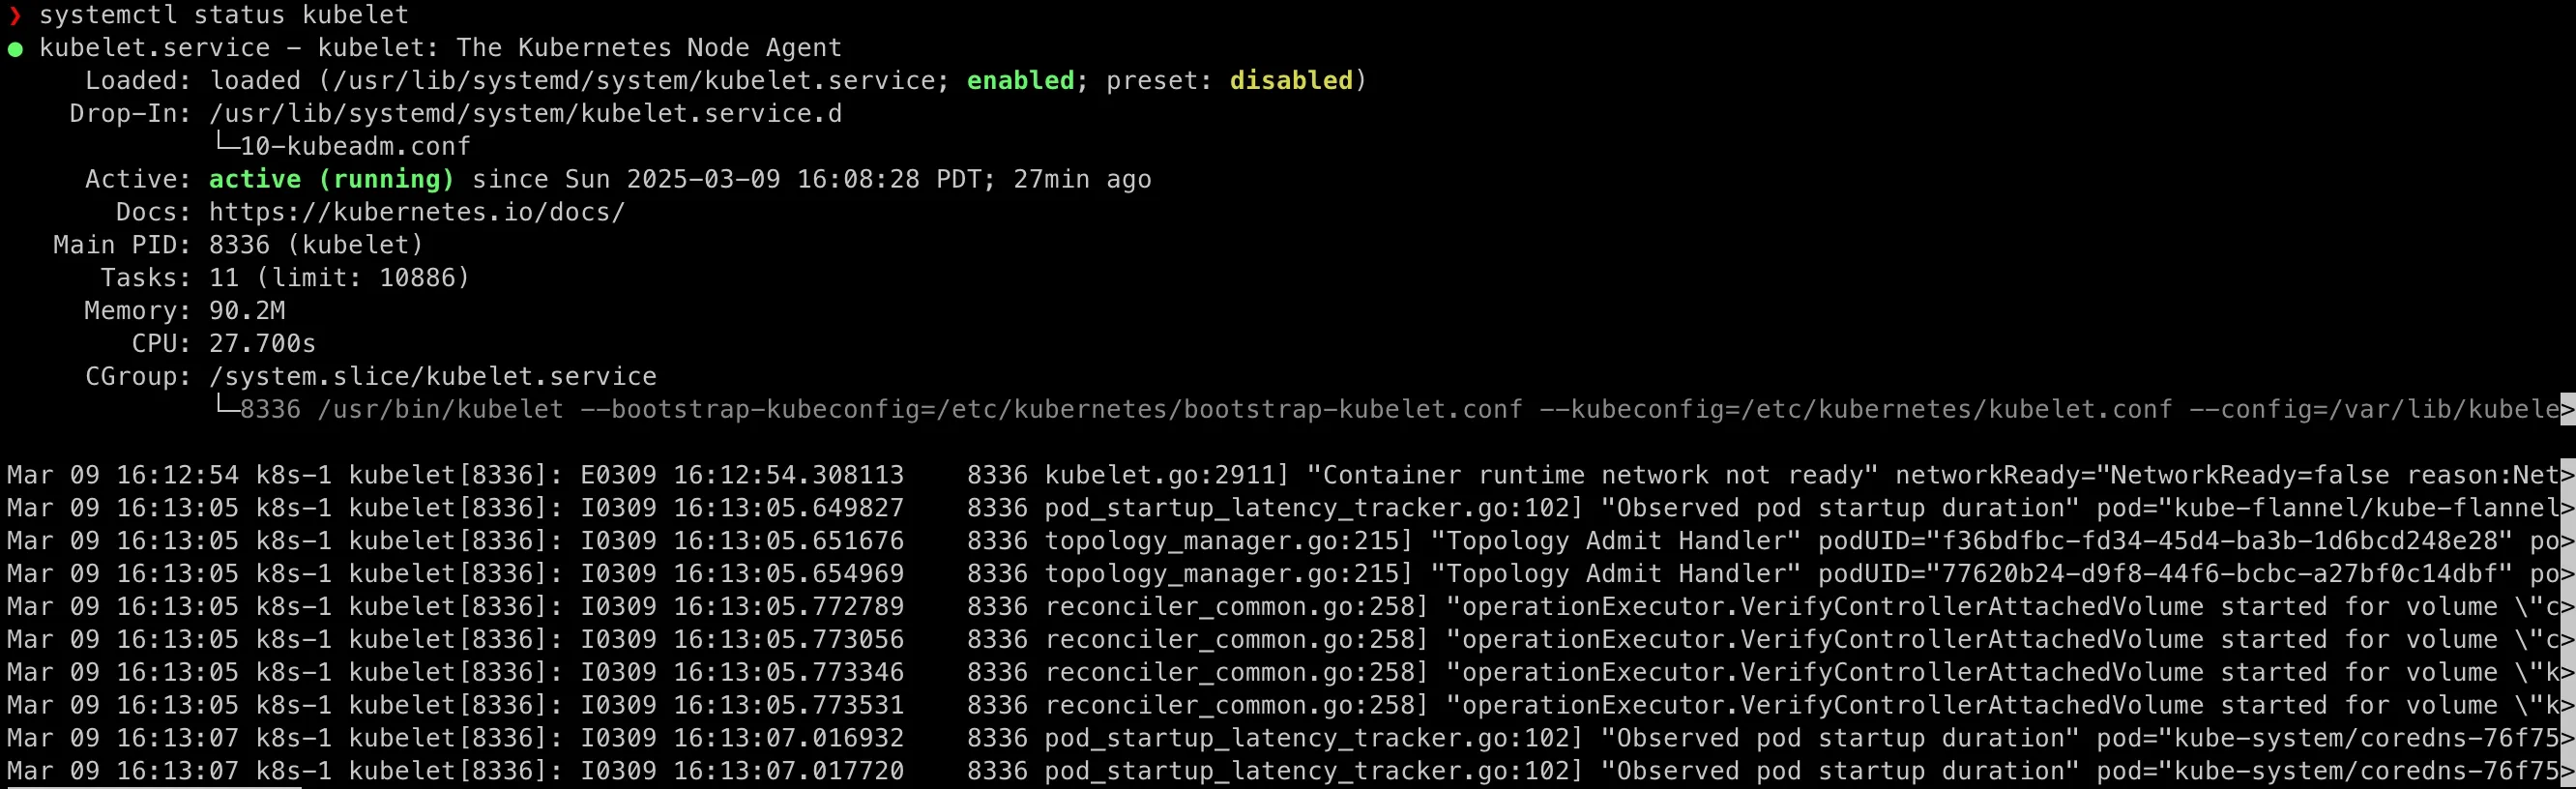
In the next section, I will explore NodePort and ClusterIP Kubernetes services with a Nginx pod into this Kubernetes cluster setup and deep dive into Flannel troubleshooting!
Stay tuned! 🚀