# NodePort vs ClusterIP - Ultimate Kubernetes Tutorial Part 4
Table of Contents
Introduction
Hey, welcome back to my ultimate Kubernetes tutorials! Now that our 1 master + 4 worker node cluster is up and running, it’s time to dive into NodePort vs. ClusterIP—two key service types in Kubernetes. Services act as the traffic controllers of your cluster, making sure pods can communicate reliably. Without them, your pods would be like isolated islands, unable to connect in a structured way. Pods are ephemeral, constantly changing IPs. That’s where Kubernetes services step in—ensuring stable access, whether for internal pod-to-pod networking or external exposure. Let’s break down how they work and when to use each! 🚀
Before we start, here comes a quick summary for common Four Kubernetes services:
| Service Type | Description | Use Case |
|---|---|---|
ClusterIP | Exposes the service internally within the cluster. No external access. | Internal microservices that only communicate within Kubernetes. |
NodePort | Exposes the service on a static port on each node’s IP, making it accessible externally. | Basic external access without a LoadBalancer. |
LoadBalancer | Creates an external load balancer that directs traffic to the service. | Production environments requiring automated load balancing. |
ExternalName | Maps a Kubernetes Service to an external DNS name instead of forwarding traffic. | Redirecting traffic to external services outside the cluster. |
Ps. Headless Service is also a Kubernetes Service type, but it behaves differently from the usual four.
In this post, I will guide you to:
✅ Create an Nginx deployment running on a single node
✅ Expose it using a NodePort Service
✅ Verify accessibility inside and outside the cluster ✅ Expose it using a ClusterIP Service ✅ Verify accessibility inside and outside the cluster ✅ Run a comparison between ClusterIP Service and NodePort Service
Let’s get started! 🚀
Deploying Nginx on a Single Node
Let’s create a simple Kubernetes deployment with Nginx running on a single node.
Create a Testing Namespace
Namespaces in Kubernetes are like virtual clusters within your cluster, helping you organize and isolate resources. By creating a testing namespace, we keep our deployment separate from the default namespace, preventing conflicts with existing workloads and making cleanup easier. This way, when we’re done experimenting, we can simply delete the namespace, wiping out everything inside it—no need to manually remove individual resources.
List our existing namespaces:
kubectl get namespaces -o wide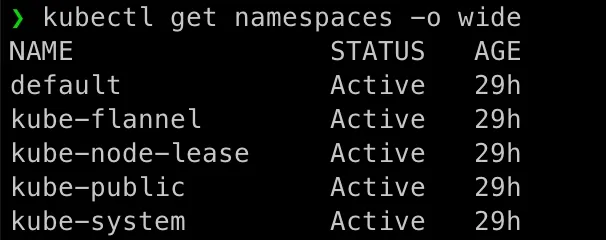
Check the current default namespace:
kubectl config get-contextsIf the NAMESPACE column is empty, it means the namespace is set to default.

Let’s create our namespace service-type-test:
kubectl create namespace service-type-test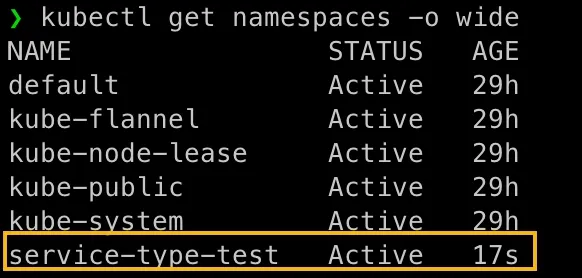
Set our new namespace service-type-test as the default:
kubectl config set-context --current --namespace=service-type-testNow, all kubectl commands (under current account session) will default to this namespace unless another is explicitly specified. If you login as root, then you need to perform the same again to get the convinience.

You can also verify the change by below command:
kubectl config view --minify --output 'jsonpath={..namespace}'Create a Deployment YAML
Now let’s create a deployment file:
cdmkdir nginx-deploymentvim nginx-deployment/nginx-single-node.yamlPaste the following YAML:
apiVersion: apps/v1kind: Deploymentmetadata: name: nginx-single namespace: service-type-test labels: app: nginxspec: replicas: 1 selector: matchLabels: app: nginx template: metadata: labels: app: nginx spec: nodeSelector: kubernetes.io/hostname: k8s-2 containers: - name: nginx image: nginx:latest ports: - containerPort: 80Apply the Deployment
kubectl apply -f nginx-deployment/nginx-single-node.yamlCheck if the pod is running:
kubectl get pods -o wideExample Output:
❯ kubectl get pods -o wideNAME READY STATUS RESTARTS AGE IP NODE NOMINATED NODE READINESS GATESnginx-single-7dfff5577-2v25s 1/1 Running 0 117s 10.244.1.2 k8s-2 <none> <none>Testing Nginx from Inside the Pod
At this moment, there is no external access. You must log into the pod or create a temporary test pod.
kubectl exec -it nginx-single-7dfff5577-2v25s -- shInside the pod:
# curl http://10.244.1.2Example Output:
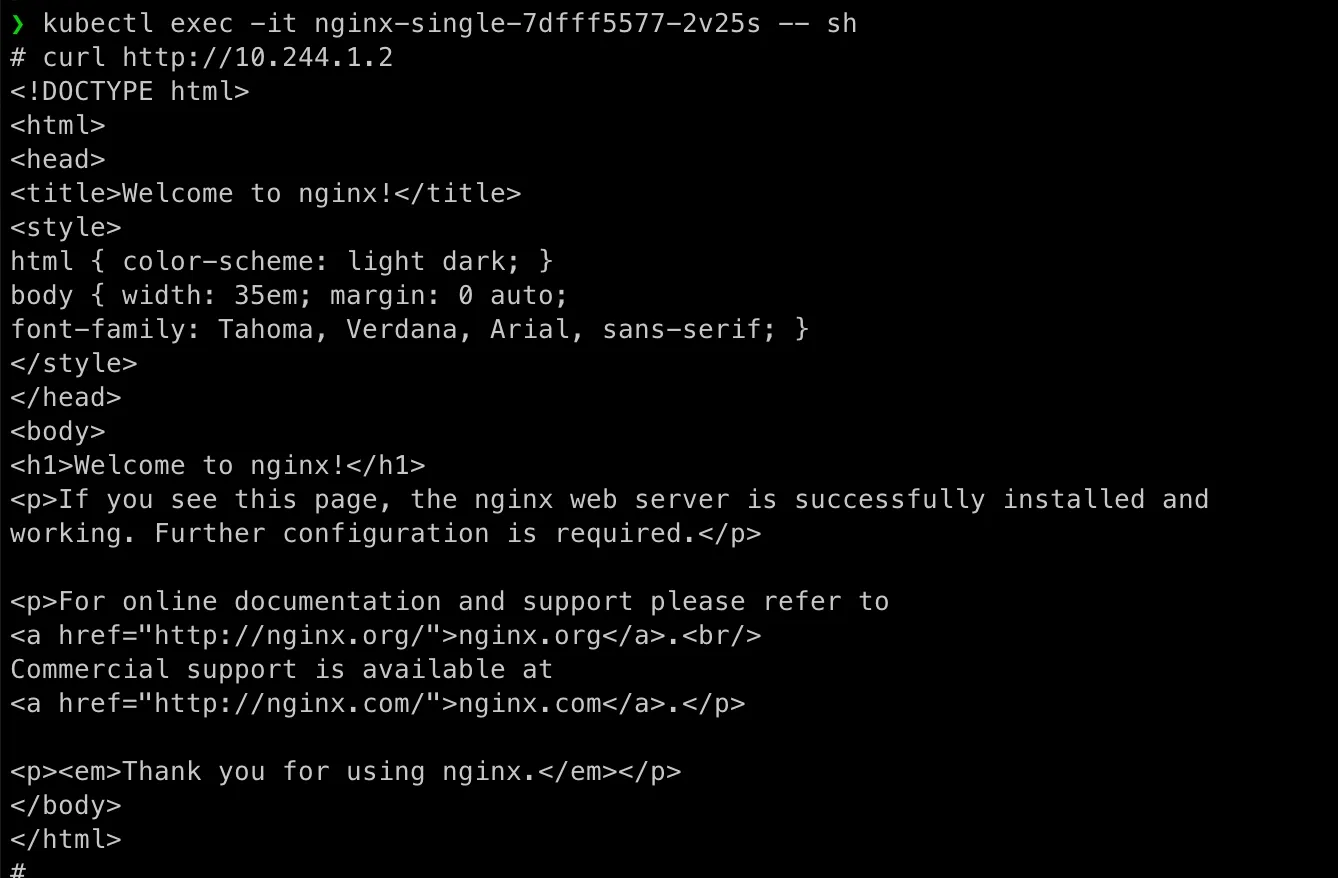
So this test method has obvisou cons, it is only valid inside the Nginx pod (not cluster-wide). Doesn’t verify network policies, DNS, or service discovery for external access.
Testing Nginx By Creating a Temporary Pod
With this method, we can test networking from a different pod (simulating real application behavior). It ensures DNS resolution and Service discovery work correctly and it’s stateless and temporary (deleted after exit).
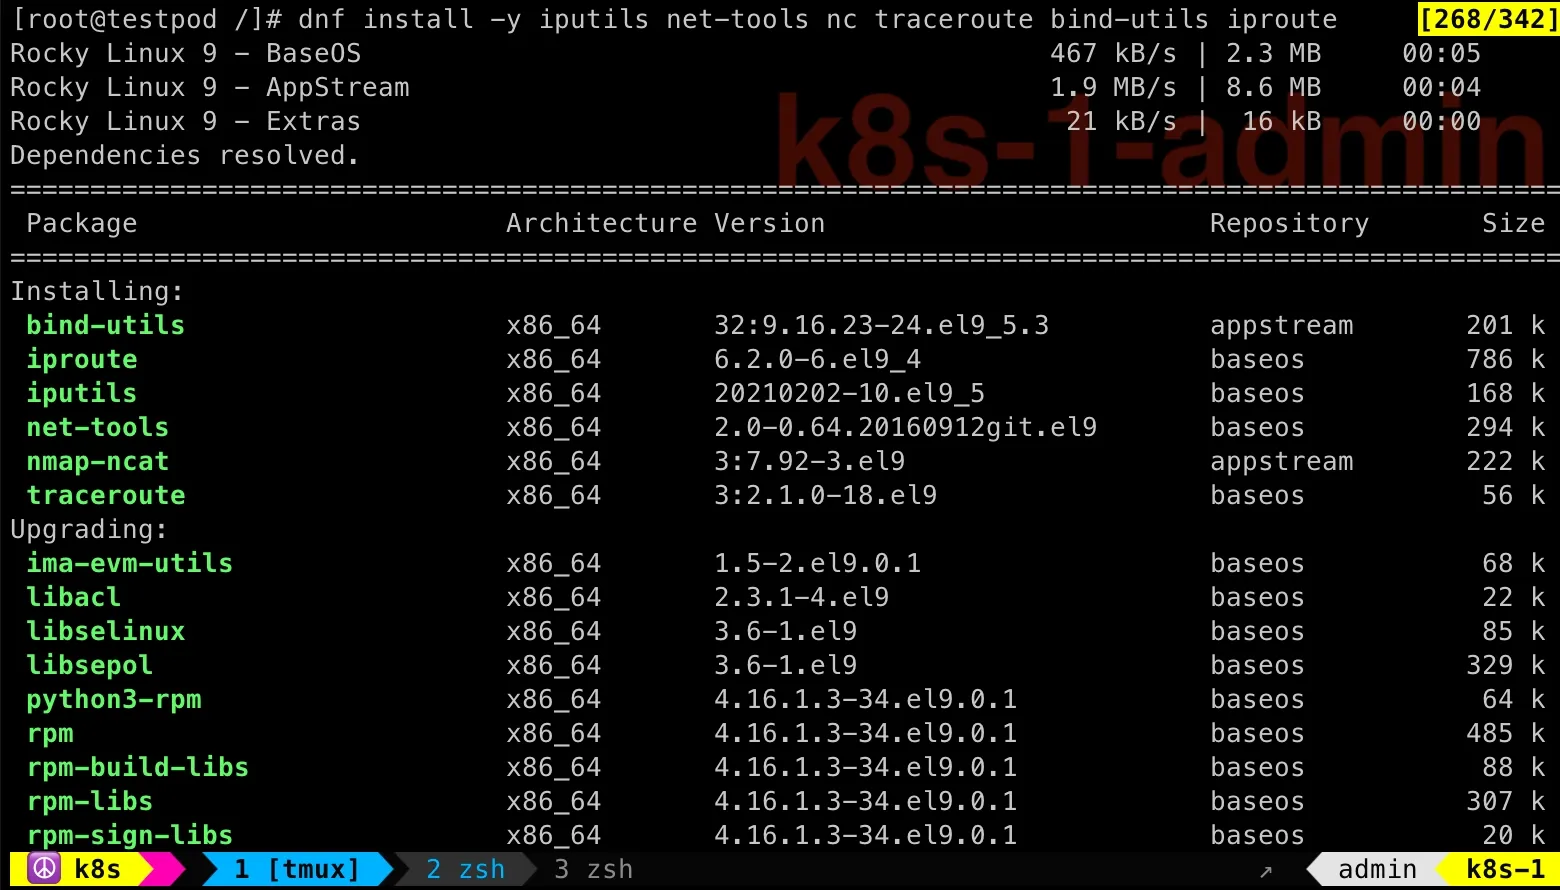
kubectl run testpod --rm -it --image=rockylinux:9 -- bashOnce it’s running, we need to install several commands, e.g. ping, nslookup:
dnf install -y iputils net-tools nc traceroute bind-utils iprouteTroubleshooting Pod’s Internet Access Issue
You might hit internet access issue in above command in the testpod:
dnf install -y iputils net-tools nc traceroute bind-utils iproute
The problem is in Kubernetes’ DNS settings.
kubectl edit configmap -n kube-system corednsLet’s add 8.8.8.8 and 1.1.1.1.
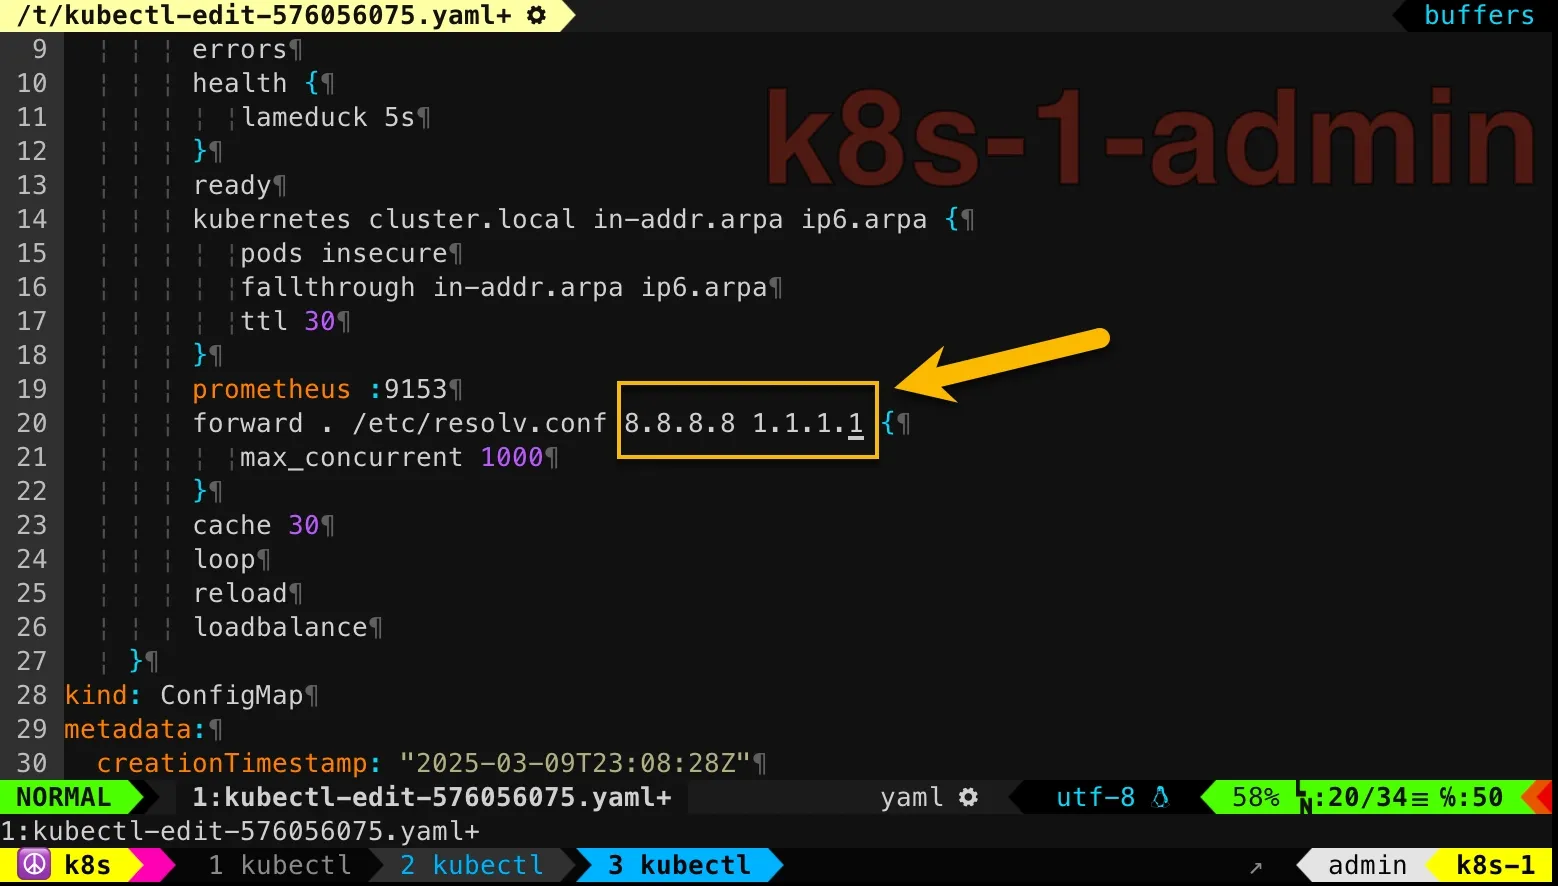
Then delete existing CoreDNS pods and then they will be re-created with latest settings:
kubectl delete pod -n kube-system -l k8s-app=kube-dnskubectl get pods -n kube-system -l k8s-app=kube-dns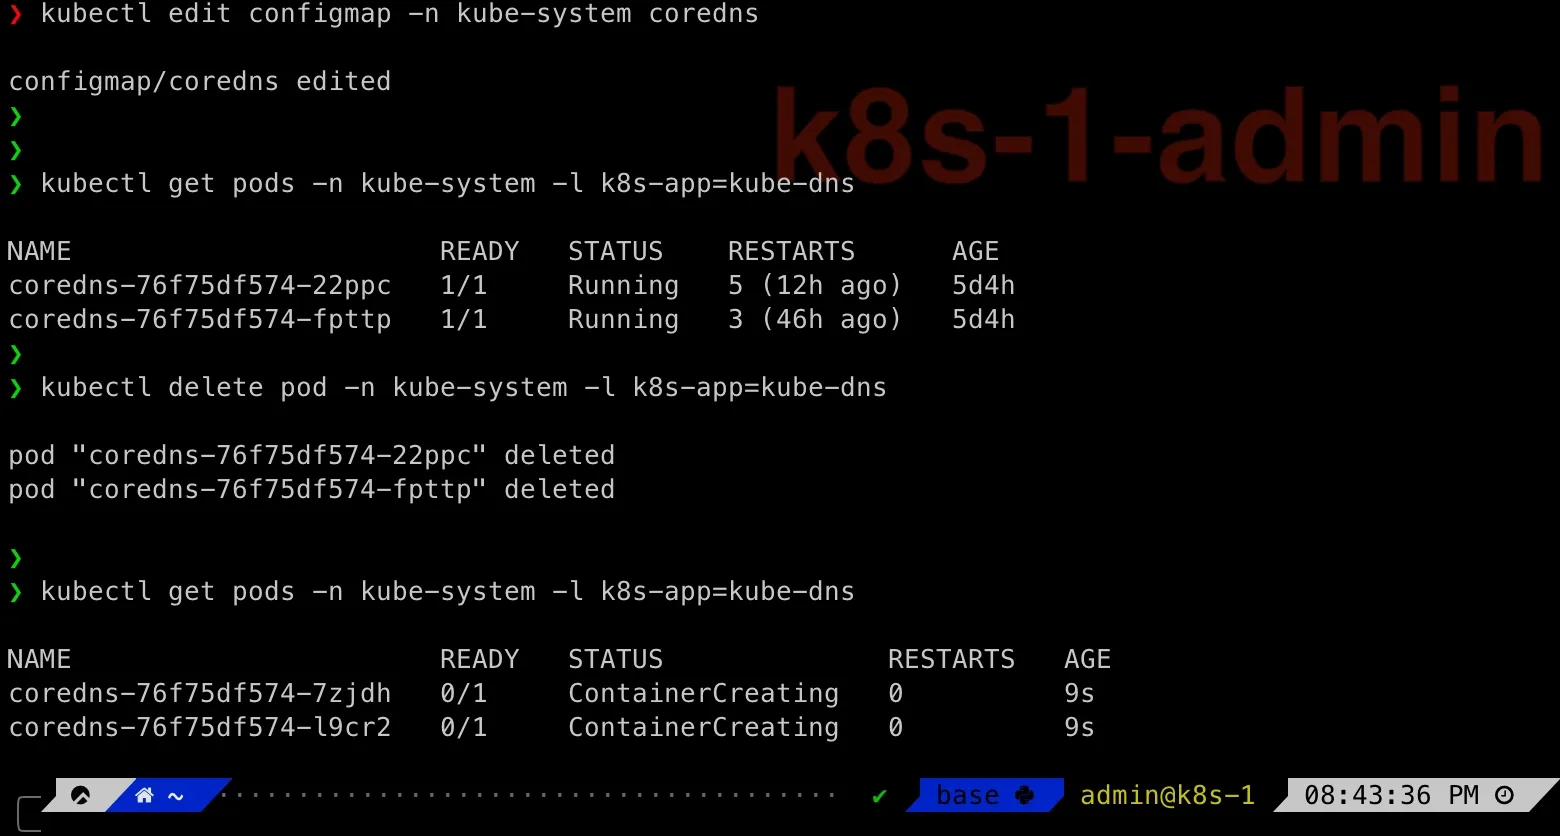
Then we can immediately check the dnf command in testpod:
Troubleshooting Pod’s Communication Issue
Check the nodes running pods:
❯ kubectl get pods -n service-type-test -o wide
NAME                           READY   STATUS    RESTARTS      AGE     IP           NODE    NOMINATED NODE   READINESS GATESnginx-single-7dfff5577-2v25s   1/1     Running   2 (46h ago)   3d23h   10.244.1.4   k8s-2   <none>           <none>testpod                        1/1     Running   0             46h     10.244.2.5   k8s-3   <none>           <none>
Now we have ping command in testpod, test ping from testpod to the nginx-single-7dfff5577-2v25s pod, you might see:
[root@testpod /]# ping 10.244.1.4PING 10.244.1.4 (10.244.1.4) 56(84) bytes of data.From 10.244.1.0 icmp_seq=1 Packet filteredFrom 10.244.1.0 icmp_seq=2 Packet filteredTypically, seeing Packet filtered is caused by firewalld rules.
Let’s first understand the network on k8s-2 worker node which is running nginx-single-7dfff5577-2v25s pod. Because when troubleshooting Kubernetes networking, one of the first things I always check is the network interfaces on my worker node. Why? Because understanding the network layout is crucial—it tells me how traffic flows within the node, and between nodes.
Running ip a gives a snapshot of all active network interfaces, and here’s what I see on my worker node:
❯ ip a1: lo: <LOOPBACK,UP,LOWER_UP> mtu 65536 qdisc noqueue state UNKNOWN group default qlen 1000 link/loopback 00:00:00:00:00:00 brd 00:00:00:00:00:00 inet 127.0.0.1/8 scope host lo valid_lft forever preferred_lft forever inet6 ::1/128 scope host valid_lft forever preferred_lft forever2: ens160: <BROADCAST,MULTICAST,UP,LOWER_UP> mtu 1500 qdisc mq state UP group default qlen 1000 link/ether 00:0c:29:56:d2:2d brd ff:ff:ff:ff:ff:ff altname enp3s0 inet 172.16.211.12/24 brd 172.16.211.255 scope global noprefixroute ens160 valid_lft forever preferred_lft forever inet6 fe80::20c:29ff:fe56:d22d/64 scope link noprefixroute valid_lft forever preferred_lft forever3: ens224: <BROADCAST,MULTICAST,UP,LOWER_UP> mtu 1500 qdisc mq state UP group default qlen 1000 link/ether 00:0c:29:56:d2:37 brd ff:ff:ff:ff:ff:ff altname enp19s0 inet 172.16.68.135/24 brd 172.16.68.255 scope global dynamic noprefixroute ens224 valid_lft 1419sec preferred_lft 1419sec inet6 fe80::2a79:5bce:ed76:fa4c/64 scope link noprefixroute valid_lft forever preferred_lft forever4: docker0: <NO-CARRIER,BROADCAST,MULTICAST,UP> mtu 1500 qdisc noqueue state DOWN group default link/ether 7e:e6:b8:4c:23:64 brd ff:ff:ff:ff:ff:ff inet 172.17.0.1/16 brd 172.17.255.255 scope global docker0 valid_lft forever preferred_lft forever5: flannel.1: <BROADCAST,MULTICAST,UP,LOWER_UP> mtu 1450 qdisc noqueue state UNKNOWN group default link/ether 06:8c:32:9e:aa:fc brd ff:ff:ff:ff:ff:ff inet 10.244.1.0/32 scope global flannel.1 valid_lft forever preferred_lft forever inet6 fe80::48c:32ff:fe9e:aafc/64 scope link valid_lft forever preferred_lft forever6: cni0: <BROADCAST,MULTICAST,UP,LOWER_UP> mtu 1450 qdisc noqueue state UP group default qlen 1000 link/ether 2a:f2:2f:f3:e1:ac brd ff:ff:ff:ff:ff:ff inet 10.244.1.1/24 brd 10.244.1.255 scope global cni0 valid_lft forever preferred_lft forever inet6 fe80::28f2:2fff:fef3:e1ac/64 scope link valid_lft forever preferred_lft forever7: vethf4df6ba9@if2: <BROADCAST,MULTICAST,UP,LOWER_UP> mtu 1450 qdisc noqueue master cni0 state UP group default link/ether 36:57:42:b1:e7:6f brd ff:ff:ff:ff:ff:ff link-netns cni-224ac32a-95b2-1ef2-b716-e1230f1e1296 inet6 fe80::3457:42ff:feb1:e76f/64 scope link valid_lft forever preferred_lft foreverTo save your time, let’s create a table:
| Interface | Purpose | Notes |
|---|---|---|
lo | Loopback | Used for internal communication within the node. Always present. |
ens160 | Primary network interface | Connected to vmnet2, providing a private network for our VMs (172.16.211.12/24). |
ens224 | Secondary network interface | Connected to another network (172.16.68.135/24) managed by VMFusion, providing external internet access. |
docker0 | Docker bridge (not used for Kubernetes) | Created by Docker but not part of Kubernetes networking. Leftover from local development. |
flannel.1 | Flannel overlay network | Handles pod-to-pod communication across nodes (10.244.1.0/32). |
cni0 | Main CNI bridge | Connects pods on this node to the Flannel overlay network (10.244.1.1/24). |
veth* | Virtual Ethernet interfaces | Bridges individual pods to the cni0 bridge. Created dynamically as pods start. |
Then checking the firewall-cmd --list-all on k8s-2:
❯ sudo firewall-cmd --list-all[sudo] password for admin:public (active) target: default icmp-block-inversion: no interfaces: ens160 ens224 flannel.1 sources: services: cockpit dhcpv6-client ssh ports: 6443/tcp 2379-2380/tcp 10250/tcp 10251/tcp 10252/tcp 10255/tcp 5473/tcp 8472/udp 30000-32767/tcp protocols: forward: yes masquerade: yes forward-ports: source-ports: icmp-blocks: rich rules:Did you spot the problem?
The cni0 is missing from the active firewalld zone! This is a problem because cni0 is the main bridge interface for pod networking—it connects all pods on this node to the Flannel overlay network. Without it being part of the public zone, firewalld might be blocking traffic between pods on this worker node.
We can verify it by enabling firewalld logs:
sudo firewall-cmd --set-log-denied=allsudo firewall-cmd --reloadThen tail -f /var/log/messages on k8s-2, you should see:
Mar 14 21:28:44 k8s-2 kernel: filter_FWD_public_REJECT: IN=flannel.1 OUT=cni0 MAC=06:8c:32:9e:aa:fc:aa:fc:a1:4d:b8:af:08:00 SRC=10.244.2.0 DST=10.244.1.4 LEN=84 TOS=0x00 PREC=0x00 TTL=62 ID=21550 DF PROTO=ICMP TYPE=8 CODE=0 ID=44547 SEQ=1Mar 14 21:28:45 k8s-2 kernel: filter_FWD_public_REJECT: IN=flannel.1 OUT=cni0 MAC=06:8c:32:9e:aa:fc:aa:fc:a1:4d:b8:af:08:00 SRC=10.244.2.0 DST=10.244.1.4 LEN=84 TOS=0x00 PREC=0x00 TTL=62 ID=22104 DF PROTO=ICMP TYPE=8 CODE=0 ID=44547 SEQ=2Good! Now we can fix the problem, just add cni0 into the public zone!
Perform this on on every node as admin:
sudo firewall-cmd --permanent --zone=public --add-interface=cni0sudo firewall-cmd --reloadThen ping should start working!
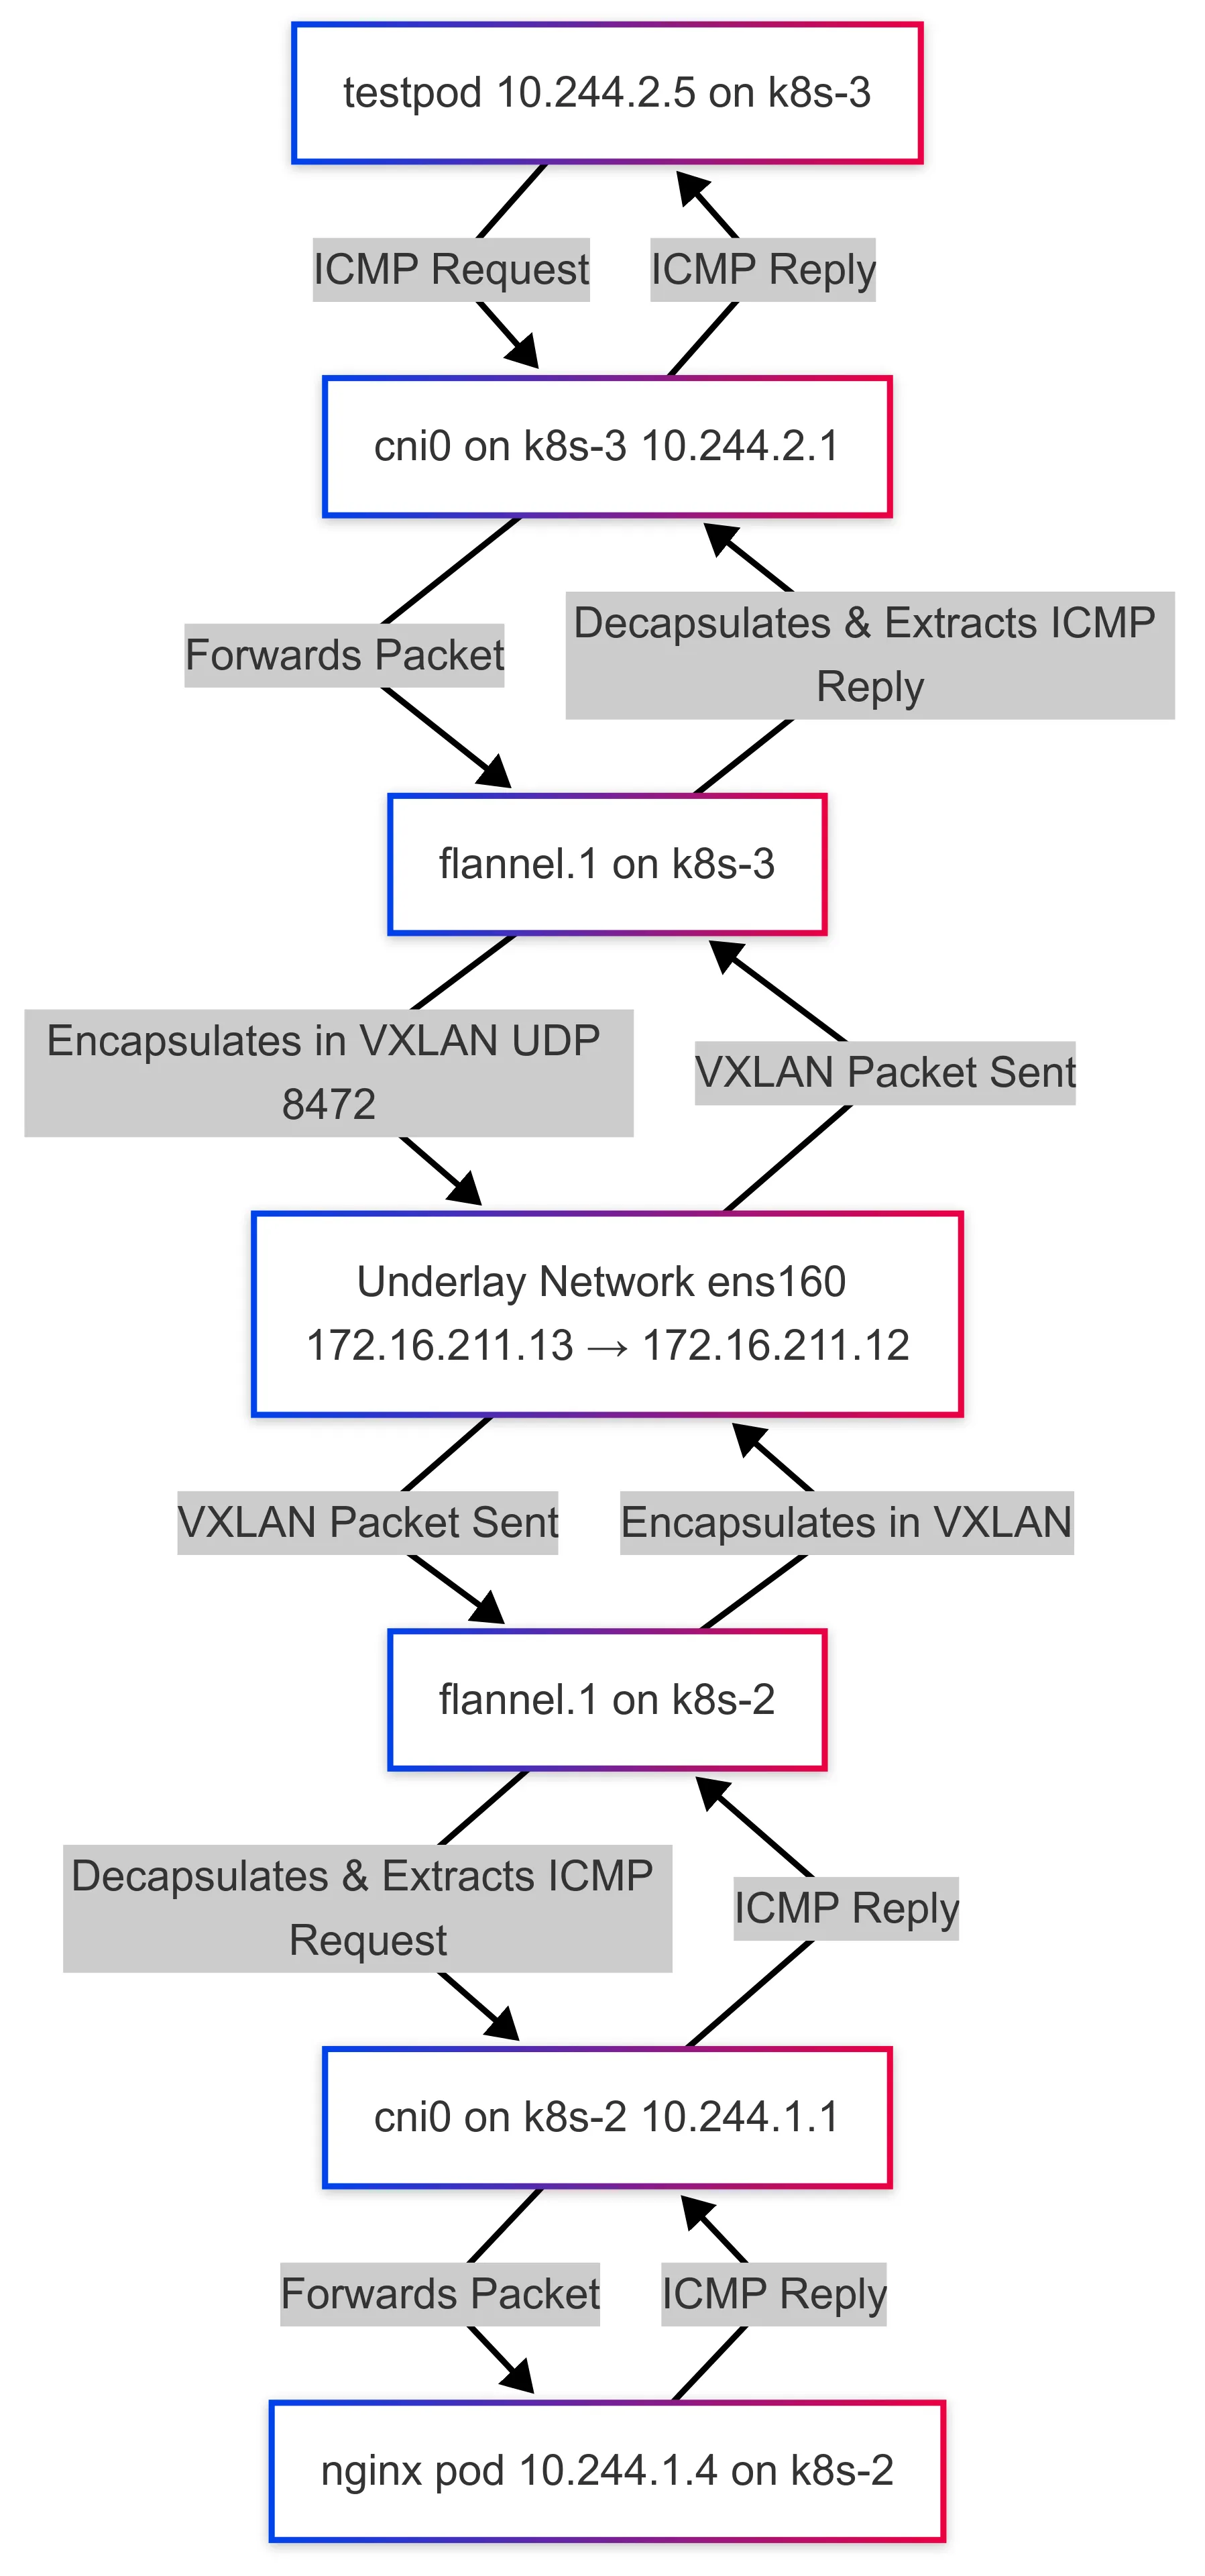
As a summary for this netowrking troubleshooting, I prepared a diagram for you:
Exploring NodePort Service
You might ask:Can
testpod ping nginx-single-7dfff5577-2v25s directly?
No,it won’t work by default.
Kubernetes does NOT create DNS records for individual pods.
- When you run
ping nginx-single-7dfff5577-2v25s, your shell tries to resolve the pod name to an IP. - But there’s no built-in DNS entry for an individual pod unless a Service is created.
So, let’s create a NodePort service for our Nginx service!
On k8s-2 master node, create a service YAML file:
vim nginx-deployment/nginx-nodeport-service.yamlPaste the following:
apiVersion: v1kind: Servicemetadata: name: nginx-service namespace: service-type-testspec: selector: app: nginx type: NodePort ports: - port: 80 targetPort: 80 nodePort: 30080Apply the service:
kubectl apply -f nginx-service.yamlWe should see:

NodePort: Nginx Access Methods
| Source | Can Access nginx-service? | Method to Use | Why? |
|---|---|---|---|
| testpod (inside cluster, same namespace) | ✅ Yes | curl http://nginx-service.service-type-test:80 | Kubernetes DNS resolves it to the service. |
| testpod (inside cluster, using Pod IP directly) | ✅ Yes | curl http://10.244.1.4:80 | Works, but not recommended (Pod IPs change). |
| testpod (inside cluster, different namespace) | ❌ No (default) ✅ Yes (if explicitly specified) | curl http://nginx-service.service-type-test.svc.cluster.local:80 | Cross-namespace access needs full DNS. |
Worker nodes (k8s-2, k8s-3, etc.) | ✅ Yes | curl http://localhost:30080 | NodePort is open on all nodes. |
Worker nodes (k8s-2, k8s-3, etc.) using Pod IP directly | ✅ Yes | curl http://10.244.1.4:80 | Because Flannel automatically configures routing between nodes. If you check route on any node, you should see something like this: ❯ ip route | grep 10.244 10.244.0.0/24 via 10.244.0.0 dev flannel.1 onlink 10.244.1.0/24 dev cni0 proto kernel scope link src 10.244.1.1 10.244.2.0/24 via 10.244.2.0 dev flannel.1 onlink 10.244.3.0/24 via 10.244.3.0 dev flannel.1 onlink 10.244.4.0/24 via 10.244.4.0 dev flannel.1 onlink |
Master node (k8s-1) | ✅ Yes | curl http://localhost:30080 | NodePort is open on all nodes. |
| Master node using Pod IP directly | ✅ Yes | curl http://10.244.1.4:80 | Same as worker nodes. |
Laptop (VMFusion, same vmnet2 network as worker nodes) | ✅ Yes | curl http://<any-worker-node-ip>:30080 | NodePort is accessible externally. |
Laptop using Pod IP directly (curl http://10.244.1.4:80) | ❌ No | N/A | Flannel can’t manage my laptop route ^^ |
Exploring ClusterIP Service
We can test ClusterIP as well, create /home/admin/nginx-deployment/nginx-clusterip-service.yaml:
apiVersion: v1kind: Servicemetadata: name: nginx-service namespace: service-type-testspec: selector: app: nginx type: ClusterIP ports: - port: 80 targetPort: 80Delete NodePort and apply ClusterIP service:
kubectl delete -f /home/admin/nginx-deployment/nginx-nodeport-service.yamlkubectl apply -f /home/admin/nginx-deployment/nginx-clusterip-service.yamlkubectl get service -n service-type-test -o wideThe output would looks like this:
❯ kubectl get service -n service-type-test -o wide
NAME            TYPE       CLUSTER-IP      EXTERNAL-IP   PORT(S)        AGE     SELECTORnginx-service   NodePort   10.101.98.109   <none>        80:30080/TCP   3h19m   app=nginx❯ kubectl delete -f /home/admin/nginx-deployment/nginx-nodeport-service.yaml
service "nginx-service" deleted❯ kubectl get service -n service-type-test -o wide
No resources found in service-type-test namespace.❯ kubectl apply -f /home/admin/nginx-deployment/nginx-clusterip-service.yaml
service/nginx-service created❯ kubectl get service -n service-type-test -o wide
NAME            TYPE        CLUSTER-IP       EXTERNAL-IP   PORT(S)   AGE   SELECTORnginx-service   ClusterIP   10.101.195.219   <none>        80/TCP    3s    app=nginx
The access method table:
| Source | Can Access nginx-service? | Method to Use | Why? |
|---|---|---|---|
| testpod (inside cluster, same namespace) | ✅ Yes | curl http://nginx-service.service-type-test:80 | Resolves to ClusterIP 10.101.195.219, accessible within the cluster. |
| testpod (inside cluster, using Pod IP directly) | ✅ Yes | curl http://10.244.1.4:80 | Works as Pod IP is routable within the cluster. |
| testpod (inside cluster, different namespace) | ✅ Yes | curl http://nginx-service.service-type-test.svc.cluster.local:80 | DNS resolves to ClusterIP, accessible within the cluster. |
Worker nodes (k8s-2, k8s-3, etc.) | ✅ Yes | curl http://10.101.195.219:80 | Because Flannel automatically configures routing. |
Master node (k8s-1) | ✅ Yes | curl http://10.101.195.219:80 | ClusterIP is accessible from within the cluster. |
Laptop (VMFusion, same vmnet2 network as worker nodes) | ❌ No | N/A | ClusterIP is internal and not exposed externally. |
Laptop using Pod IP directly (curl http://10.244.1.4:80) | ❌ No | N/A | Pod IPs (10.244.x.x) are not reachable from outside the cluster. |
What is a ClusterIP? Why Can a Worker Node Access the ClusterIP?
I know you might ask this. Here comes the breakdown:
1. ClusterIP is a Virtual IP Managed by kube-proxy.
10.101.195.219 is not tied to any single pod or node—it’s a virtual IP managed by kube-proxy. When a request is made to 10.101.195.219:80, kube-proxy redirects it to one of the matching pods (10.244.1.4:80).
2. Flannel Provides Pod-to-Pod Connectivity Across Nodes
I’ve mentioned previously, Flannel creates an overlay network so all Pods (10.244.x.x) can communicate, even across different nodes. If the Nginx pod (10.244.1.4) is on a different node (k8s-2) (testpod is on k8s-3), Flannel encapsulates the traffic and routes it through the worker nodes’ ens160 (172.16.211.x) interfaces.
3. Iptables Rules Handle Traffic Routing
kube-proxy sets up iptables rules on each node to redirect ClusterIP traffic to the actual pod. Let’s run iptables-save | grep 10.101.195.219 on any node, you would see below rules forwarding traffic to 10.244.1.4:

NodePort vs ClusterIP
Before we wrap up, let’s take a step back and compare ClusterIP and NodePort, two essential service types in Kubernetes. While both enable communication within a cluster, their accessibility and use cases differ significantly. Whether you’re building internal microservices or exposing an application externally, choosing the right service type is crucial.
It’s alwasy easy to compare two similar technologies with a comparison table. The table below summarizes their key differences to help you decide which one fits your needs best.
| Feature | ClusterIP | NodePort |
|---|---|---|
| Accessibility | Only accessible within the cluster | Accessible from outside the cluster via NodeIP:NodePort |
| Default Behavior | Assigned a private IP within the cluster | Exposes a service on a high-numbered port (30000-32767) on each node |
| Use Case | Internal communication between microservices | External access without a LoadBalancer, typically for development/testing |
| How to Access | Via ClusterIP or service name inside the cluster | Via http://: from clients |
| Example Service YAML | apiVersion: v1 kind: Service metadata: name: my-clusterip-service spec: type: ClusterIP selector: app: my-app ports: - port: 80 targetPort: 80 | apiVersion: v1 kind: Service metadata: name: my-nodeport-service spec: type: NodePort selector: app: my-app ports: - port: 80 targetPort: 80 nodePort: 30080 |
| Requires External Networking? | No, works entirely within the cluster | Yes, needs the node’s IP to be reachable |
| Security Considerations | More secure since it’s only accessible inside the cluster | Less secure as it exposes a port on all nodes |
🎉 Congratulations!
If you’ve made it this far, congrats! Our Nginx instance is now fully accessible and we’ve learned NodePort and ClusterIP services, and honestly, this feels like a huge win!
Next up, I’ll be diving into other Kubernetes services—ExternalName and LoadBalancer—because why stop when there’s so much more to explore?
Stay tuned for the next post! 😎🔥